Category Archives: Manuals

hyundai sonata manual

Category : Manuals

Hyundai Sonata Manual: A Comprehensive Guide

Discover the full potential of your Sonata! This guide, alongside the 2009 & 2013 repair manuals, unlocks features and functionality for all owners today.

Welcome to the definitive resource for your Hyundai Sonata! This manual serves as a comprehensive companion, designed to empower both new and experienced Sonata owners. Whether you’ve recently joined the “Club” – as some online communities affectionately call it – or are a long-time enthusiast, this guide will unlock the full potential of your vehicle.

We understand that navigating a modern vehicle can be complex. Therefore, this manual aims to demystify its features and functionality. It’s more than just a collection of instructions; it’s a pathway to understanding your Sonata’s capabilities, ensuring safe operation, and maximizing its lifespan. From routine maintenance to troubleshooting common issues, we’ve got you covered. Prepare to delve into a world of knowledge tailored specifically for your Hyundai Sonata!

Understanding Your Sonata’s Model Year

Hyundai Sonatas have evolved significantly over the years, with each model year introducing unique features and specifications. This manual acknowledges those differences, providing targeted information for various generations. Specifically, we’ll be focusing on the 2009 and 2013 models, recognizing they represent distinct eras in Sonata design and technology.

It’s crucial to identify your Sonata’s exact model year as certain procedures and component locations may vary. Utilizing the correct repair manual – whether the official Hyundai version or a reputable third-party resource – is paramount. This ensures accurate diagnostics and effective repairs. Understanding these nuances will save you time, frustration, and potentially costly mistakes. Consider this section your starting point for a model-year-specific understanding of your Sonata.

2009 Hyundai Sonata Manual Specifics

The 2009 Hyundai Sonata manual focuses on a generation known for its comfortable ride and value. Key areas covered include maintenance of the 2.4L inline-4 and 3.3L V6 engines, detailing oil change procedures and filter replacements specific to these powertrains. Owners should pay close attention to sections regarding the timing belt (if equipped) and recommended service intervals.

Troubleshooting common issues like warning light diagnostics and jump-starting procedures are also thoroughly addressed. The manual provides detailed diagrams of the instrument panel and explains the functionality of various controls. Remember to consult the manual for specific fuse locations and wiring schematics when performing electrical repairs. Accessing a dedicated 2009 repair manual will greatly enhance your ownership experience.

2013 Hyundai Sonata Manual Specifics

The 2013 Hyundai Sonata manual details a model year featuring updated styling and enhanced technology. This guide emphasizes understanding the vehicle’s improved safety features and infotainment system. Owners will find comprehensive instructions on operating the touchscreen interface, Bluetooth connectivity, and navigation system (if equipped). Maintenance sections cover the 2.0L Turbocharged GDI, 2.4L GDI, and Hybrid powertrains, with specific attention to GDI engine maintenance requirements.

Troubleshooting focuses on issues related to the newer electronic systems. The manual provides detailed information on jump-starting procedures and interpreting warning lights. Utilizing a dedicated 2013 repair manual alongside the owner’s manual will prove invaluable for both routine maintenance and more complex repairs, ensuring optimal performance and longevity.

Essential Sections of the Owner’s Manual

Your Hyundai Sonata owner’s manual is structured to provide crucial information for safe and efficient vehicle operation. Key sections begin with comprehensive Safety Precautions and Warnings, detailing airbag systems, seatbelt usage, and child safety restraints. Equally important is Vehicle Identification and Key Information, covering VIN decoding, engine specifications, and maintenance schedules tailored to your specific model.

Further sections explain all operating procedures, from starting the engine to utilizing advanced features. Understanding these core areas ensures responsible vehicle ownership. Regularly reviewing these essential sections will empower you to address potential issues proactively and maintain your Sonata’s performance and value over time.

Safety Precautions and Warnings

Prioritizing safety is paramount when operating your Hyundai Sonata. The owner’s manual dedicates significant space to crucial precautions. This includes detailed explanations of the airbag system – deployment zones, potential hazards, and proper seating positions. Seatbelt usage is emphasized for all occupants, outlining correct fitting and potential injury risks if not utilized.

Child safety receives extensive coverage, detailing proper installation and use of child restraint systems. Warnings regarding fuel handling, exhaust fumes, and electrical system hazards are also prominently featured. Always heed these warnings to prevent accidents and ensure the well-being of yourself and your passengers. Ignoring these precautions could lead to serious injury or vehicle damage.

Vehicle Identification and Key Information

Locating your Hyundai Sonata’s Vehicle Identification Number (VIN) is crucial for various purposes, including warranty claims, theft recovery, and service history tracking. The manual details the VIN’s location – typically on the driver’s side dashboard near the windshield, and also on the vehicle registration documents.

Understanding key codes and immobilizer systems is also covered. This section explains how to obtain replacement keys and the procedures for reprogramming them. Information regarding the engine and transmission codes, paint code, and other essential vehicle specifications are provided. Proper record-keeping of this information is highly recommended for future reference and to streamline any service or repair needs.

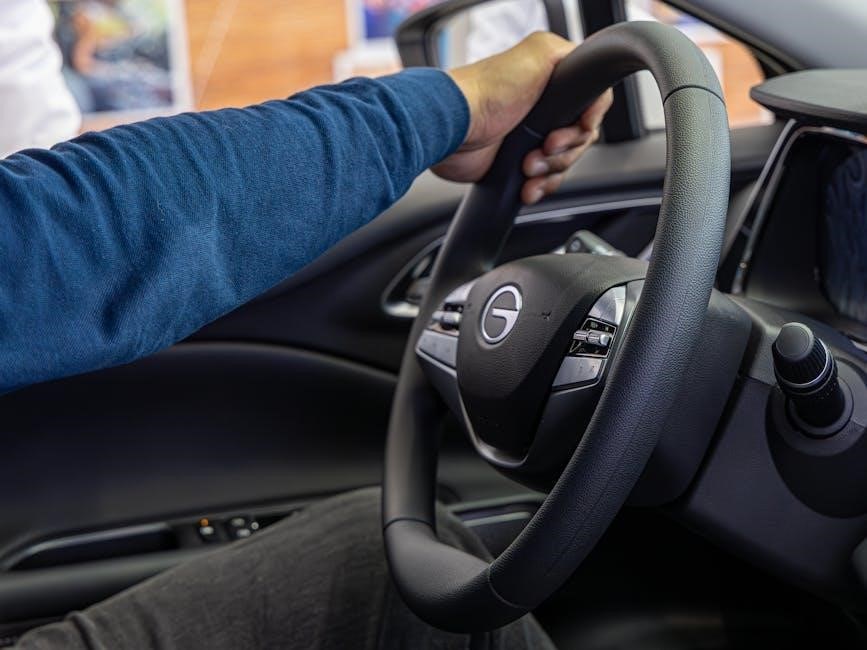
Operating Your Hyundai Sonata

Mastering the operation of your Hyundai Sonata begins with a thorough understanding of its core functions. This section provides detailed instructions on safely starting and stopping the engine, covering both standard and smart key systems. Explore the intricacies of the instrument panel, deciphering warning lights, gauges, and information displays to monitor vehicle performance.

Learn to effectively utilize all controls and features, including headlights, windshield wipers, turn signals, and hazard lights. The manual offers guidance on adjusting mirrors, seats, and climate control for optimal comfort. Discover how to operate the infotainment system, Bluetooth connectivity, and other technological features enhancing your driving experience.

Starting and Stopping the Engine

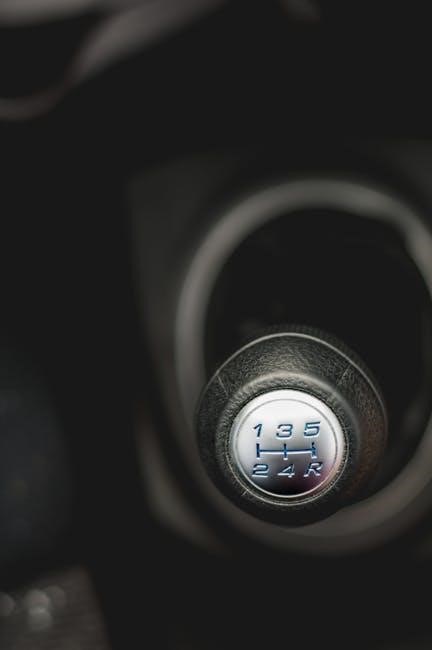
Proper engine operation is crucial for your Sonata’s longevity. This guide details starting procedures for both key-equipped and push-button start systems. Ensure the parking brake is engaged and the gear selector is in ‘Park’ before attempting to start. Familiarize yourself with the ignition sequence – typically requiring a full depression of the brake pedal alongside the start button.

To stop the engine, simply press the start/stop button while the vehicle is in ‘Park’ or ‘Neutral’. Avoid prolonged idling, as it can negatively impact fuel efficiency and engine wear; Understand emergency shut-off procedures and the function of the immobilizer system for enhanced security. Always consult the manual for model-year specific instructions.

Understanding the Instrument Panel

The Hyundai Sonata’s instrument panel provides vital information about your vehicle’s status. Key indicators include the speedometer, tachometer, fuel gauge, and temperature gauge. Pay close attention to warning lights – these signal potential issues requiring immediate attention. Familiarize yourself with the meaning of each icon, referencing the owner’s manual for detailed explanations.

The panel also displays information from the trip computer, including mileage, average fuel consumption, and estimated driving range. Learn to navigate the settings to customize the displayed information. Understanding the instrument panel empowers you to monitor your Sonata’s performance and proactively address any concerns, ensuring a safe and enjoyable driving experience.

Controls and Features – Lights, Wipers, and Signals

Mastering your Hyundai Sonata’s controls is crucial for safe operation. The headlight switch controls exterior lighting, including headlights, parking lights, and fog lights – understand the different settings for varying conditions. Wiper controls adjust speed and operation, with settings for intermittent wiping, continuous wiping, and rear window operation.

Signal controls activate turn signals and hazard lights; ensure proper usage before changing lanes or making turns. Familiarize yourself with the location of each control and practice using them while parked. Proper operation of these features enhances visibility and communicates your intentions to other drivers, contributing to a safer driving environment for everyone on the road.

Maintenance Schedule and Procedures

Maintaining your Hyundai Sonata is vital for longevity and performance. Regular maintenance, as outlined in your owner’s manual, prevents costly repairs and ensures optimal fuel efficiency. This includes routine checks and replacements of essential components.

Adhere to the recommended schedule for oil changes, filter replacements (air, fuel, cabin), and fluid level checks. Pay close attention to tire maintenance – proper inflation, rotation, and timely replacement are crucial for safety. Ignoring these procedures can lead to decreased performance, increased wear and tear, and potentially hazardous driving conditions. Consistent upkeep preserves your Sonata’s value and reliability.

Routine Maintenance – Oil Changes and Filter Replacements

Regular oil changes are paramount for your Hyundai Sonata’s engine health. Consult your owner’s manual for the recommended oil type and change intervals, typically every 7,500 to 10,000 miles, or annually. Neglecting oil changes leads to increased friction, wear, and potential engine damage.

Alongside oil changes, filter replacements are equally important. Air filters prevent contaminants from entering the engine, while fuel filters ensure clean fuel delivery. Cabin air filters maintain air quality inside the vehicle. Replace these filters according to the maintenance schedule outlined in your manual, contributing to optimal performance and a comfortable driving experience. Proper filtration extends the life of key components.

Tire Maintenance – Pressure, Rotation, and Replacement

Maintaining proper tire pressure is crucial for safety, fuel efficiency, and tire longevity. Check your tire pressure monthly using a reliable gauge, and inflate to the recommended PSI found on the sticker inside your driver’s side doorjamb. Underinflated tires wear unevenly and reduce gas mileage, while overinflated tires compromise ride comfort.

Regular tire rotation – typically every 5,000 to 7,500 miles – ensures even wear across all tires, maximizing their lifespan. Follow the rotation pattern specified in your Hyundai Sonata’s manual. Inspect tires for tread depth, damage, and uneven wear. Replace tires when tread depth reaches the legal limit, or if significant damage is present, prioritizing safety and control.

Fluid Checks – Coolant, Brake Fluid, and Power Steering Fluid

Regularly checking your Hyundai Sonata’s fluids is vital for optimal performance and preventing costly repairs. Inspect the coolant level in the reservoir when the engine is cold; add a 50/50 mix of coolant and distilled water if low. Brake fluid levels should also be checked, ensuring they remain between the minimum and maximum marks on the reservoir – low levels indicate potential leaks.

Power steering fluid is equally important. Check the reservoir and top up with the recommended fluid type if needed. Note any changes in fluid color or consistency, as this could signal contamination or a system issue. Refer to your owner’s manual for specific fluid types and checking procedures for your Sonata’s model year.

Troubleshooting Common Issues

Encountering problems with your Hyundai Sonata can be stressful, but many issues are easily addressed. Warning lights on the dashboard require immediate attention; consult your owner’s manual to decipher their meaning. If your battery is drained, learn the proper jump starting procedures to avoid damaging the electrical system – incorrect connections can be harmful.

Performing basic diagnostic checks, like inspecting fluid levels and checking for obvious leaks, can help pinpoint the source of the problem. Remember to always prioritize safety and consult a qualified mechanic for complex repairs. Utilizing online forums and repair manuals can provide valuable insights and guidance for tackling common Sonata issues effectively.

Dealing with Warning Lights

Illuminated warning lights on your Hyundai Sonata’s dashboard signal potential issues requiring prompt investigation. Do not ignore these indicators! The owner’s manual provides a detailed explanation of each light’s meaning, ranging from minor maintenance reminders to critical system failures. A solid light generally indicates an ongoing problem, while a flashing light often signifies a more urgent concern.

Common warning lights include the check engine light, oil pressure light, and battery light. Before assuming the worst, consult the manual to understand the specific code and potential causes. If you’re unsure, it’s always best to seek professional diagnosis from a qualified mechanic to prevent further damage and ensure your safety.

Jump Starting Procedures

A dead battery can leave you stranded, but safely jump-starting your Hyundai Sonata is often straightforward. First, ensure both vehicles are turned off and not touching. Connect the red (positive) cable to the positive terminal of the dead battery, then to the positive terminal of the good battery. Next, connect the black (negative) cable to the negative terminal of the good battery, and finally, to a grounded metal surface on the Sonata – not the negative terminal of the dead battery.

Start the good vehicle and let it run for a few minutes, then attempt to start the Sonata. Once started, carefully disconnect the cables in reverse order. Consult your owner’s manual for specific guidance and safety precautions related to your Sonata’s model year.

Basic Diagnostic Checks

Before seeking professional help, perform some basic checks. Visually inspect fluid levels – oil, coolant, brake fluid, and power steering fluid – noting any significant drops or leaks. Listen for unusual noises during engine operation, like knocking or hissing. Check the tire pressure and condition, looking for uneven wear or damage.

Pay attention to warning lights on the instrument panel; these provide crucial clues. A simple scan tool (available at auto parts stores) can read diagnostic trouble codes (DTCs) which pinpoint potential issues. Remember to consult your Sonata’s repair manual for DTC definitions and recommended actions. These initial steps can help you understand the problem and communicate effectively with a mechanic.

Hyundai Sonata Repair Manual Resources

Accessing reliable repair information is crucial for Sonata maintenance and repair. Official Hyundai repair manuals, often available through dealerships or online subscription services, provide the most accurate and detailed guidance. Numerous third-party repair manuals, like Haynes or Chilton, offer a more affordable alternative, covering common procedures.

Explore online databases and forums dedicated to Hyundai vehicles; these platforms often contain valuable troubleshooting tips and shared experiences from fellow Sonata owners. Online communities can be a fantastic resource for diagnosing tricky issues and finding solutions. Remember to verify information from unofficial sources before implementing any repairs. Utilizing a combination of these resources ensures you have the knowledge needed to keep your Sonata running smoothly.

Official Hyundai Repair Manuals

Genuine Hyundai repair manuals represent the gold standard for detailed and accurate vehicle information. Typically sourced directly from Hyundai, these manuals offer comprehensive coverage of every system within your Sonata, from engine mechanics to electrical diagrams. Dealerships are a primary source, though availability and cost can vary.

Alternatively, Hyundai offers online subscription services granting access to digital versions of these manuals, often updated with the latest technical bulletins. These digital resources frequently include wiring schematics, diagnostic flowcharts, and detailed repair procedures. While generally more expensive than third-party options, official manuals minimize the risk of incorrect information, ensuring repairs are performed to Hyundai’s specifications, preserving vehicle integrity and warranty compliance.

Third-Party Repair Manuals and Online Databases

Numerous third-party repair manuals, like those from Haynes or Chilton, provide a cost-effective alternative to official Hyundai resources. These manuals generally offer simplified instructions and diagrams, focusing on common maintenance and repair tasks. Online databases, such as ALLDATA and Mitchell OnDemand, deliver extensive repair information, including technical service bulletins and diagnostic trouble codes.

However, it’s crucial to verify the accuracy and model-year specificity of these resources, as information can sometimes be outdated or inaccurate. User reviews and comparisons are valuable when selecting a third-party manual or database. While potentially saving money, remember that relying solely on these sources may require additional research and a higher level of mechanical expertise.

Online Forums and Communities for Sonata Owners

Hyundai Sonata owners’ forums and online communities represent invaluable resources for troubleshooting, repair advice, and sharing experiences. Platforms like SonataForums.com and Reddit’s r/HyundaiSonata connect owners facing similar issues, fostering collaborative problem-solving. Members frequently share DIY repair guides, diagnostic tips, and insights into common Sonata problems.

These communities often feature dedicated sections for specific model years, ensuring relevant information. However, always critically evaluate advice received online, verifying information with official repair manuals or qualified mechanics. Participating in these forums can significantly enhance your understanding of your Sonata and potentially save on repair costs, but caution is advised.


instant pot air fryer manual pdf

Category : Manuals

Instant Pot Air Fryer Manual PDF: A Comprehensive Guide

Navigating the world of Instant Pot air fryers requires access to reliable documentation. This guide focuses on locating and utilizing the official PDF manual for your specific model, ensuring optimal performance and safety.

Understanding Instant Pot Air Fryer Models

Instant Pot offers a diverse range of air fryer models, each with unique features and functionalities. The Vortex series, including the VersaZone, Plus, and standard models, represents a significant portion of their air frying lineup. Understanding these distinctions is crucial when searching for the correct manual.

Models vary in capacity, from compact 5.7L options like the Instant Vortex Plus Clear Cook Air Fryer, to larger 13L ovens. Some, like the Instant Vortex Plus Clear Cook Dual Air Fryer 8L, feature dual baskets for simultaneous cooking. Identifying your model’s specific attributes – capacity, features like clear cook windows, or dual-zone functionality – will streamline the manual search process. Knowing whether you have an oven-style air fryer or a basket-style model is also essential.

Furthermore, newer models often integrate with the Instant Pot app, offering expanded recipe options and control features.

Identifying Your Specific Model

Accurately identifying your Instant Pot air fryer model is the first step towards finding the correct PDF manual. The model number is typically located on a sticker or plate on the appliance itself. Check the bottom of the unit, the back panel, or inside the basket compartment. Look for a combination of letters and numbers, such as “Instant Vortex Plus 6QT” or “Instant Vortex VersaZone 8.5L”.

Carefully note the complete model number, including any suffixes or variations. This information is vital for a precise search on the Instant Pot website or third-party repositories. If you’ve misplaced the original packaging, a thorough physical inspection of the appliance is necessary.

Sometimes, the model name is prominently displayed, but the full number is needed for accurate manual retrieval. A clear understanding of your model ensures you access the correct instructions and safety guidelines.

Locating the Official PDF Manual

The most reliable source for your Instant Pot air fryer’s PDF manual is the official Instant Pot website. Once you’ve identified your specific model (as detailed previously), navigate to the “Support” or “Manuals” section of InstantPot.com. Utilize the search function, entering your complete model number for precise results.

The website typically offers a downloadable PDF version of the user manual, readily accessible without registration. Ensure the manual corresponds to your exact model to avoid confusion. If the website’s search function proves challenging, browse through the categorized lists of air fryer models.

Downloading directly from Instant Pot guarantees you receive the most up-to-date and accurate documentation, including safety instructions and warranty information. Always prioritize official sources for critical appliance information.

Instant Pot Website & Manual Downloads

InstantPot.com serves as the primary hub for accessing official manuals. Upon reaching the site, locate the “Support” section, often found in the header or footer. Within “Support,” a dedicated “Manuals” or “Resources” area houses a comprehensive library of downloadable PDFs.

The website’s search bar is invaluable; inputting your precise model number (e.g., Instant Vortex Plus 6-Quart) will filter results effectively. Alternatively, you can browse by product category – selecting “Air Fryers” – and then narrowing down by specific model lines like “Vortex” or “VersaZone”.

Downloaded manuals are typically in PDF format, compatible with most devices. Instant Pot frequently updates its manuals, so ensure you have the latest version for accurate information. Registration isn’t usually required for manual downloads, streamlining the process.

Third-Party Manual Repositories

While the Instant Pot website is the preferred source, several third-party repositories offer Instant Pot air fryer manuals. ManualsLib and similar sites compile user manuals from various manufacturers, including Instant Pot. These platforms can be useful if you encounter difficulties locating the manual on the official website or require an archived version.

However, exercise caution when using these sources. Verify the manual’s authenticity by comparing the model number and publication date with information on the Instant Pot website. Ensure the downloaded file is free from malware before opening it.

These repositories often host user-submitted content, so accuracy isn’t always guaranteed. Always prioritize the official Instant Pot manual when available. Consider these sites as a backup resource, not a primary source, for reliable information regarding your air fryer.

Key Features & Functions Explained

Understanding your Instant Pot Air Fryer’s capabilities is crucial. Explore Smart Programs, temperature controls, and versatile cooking modes like air fry, roast, and dehydrate for optimal results.

Smart Programs: A Detailed Overview

Instant Pot Air Fryers boast a range of pre-programmed “Smart Programs” designed for convenience and consistent cooking. These presets eliminate guesswork, offering optimized settings for popular dishes. Common programs include “Air Fry” for crispy textures, “Roast” for whole chickens or vegetables, “Bake” for cakes and pastries, and “Reheat” for revitalizing leftovers.

The manual details each program’s default time and temperature, serving as a starting point for customization. Experimentation is encouraged to achieve preferred results, as cooking times can vary based on food quantity and desired crispness. The “Dehydrate” function allows for making fruit leathers or jerky, while some models feature specialized programs like “French Fries” or “Pizza”.

Refer to your specific model’s manual for a complete list and detailed explanations of each Smart Program; Understanding these presets unlocks the full potential of your Instant Pot Air Fryer, simplifying meal preparation and delivering delicious outcomes.

Temperature & Time Controls

Precise temperature and time control are fundamental to successful air frying. Your Instant Pot Air Fryer manual details the adjustable range for both settings, typically spanning from 90°F to 400°F (32°C to 204°C) for temperature, and from 1 to 60 minutes for time. Digital touchscreens or dial controls facilitate easy adjustments.

The manual emphasizes the importance of referencing cooking charts for recommended temperature and time combinations based on the food type and quantity. Lower temperatures are ideal for delicate foods, while higher temperatures promote crisping. Time adjustments are crucial for achieving desired doneness.

Understanding how to manually override the Smart Programs allows for customized cooking. The manual provides guidance on incremental adjustments and monitoring food progress. Accurate temperature and time management are key to preventing undercooked or overcooked results, ensuring consistently delicious meals.

Preheating & Cooking Modes

The Instant Pot Air Fryer manual clarifies the importance of preheating for optimal results. While not always mandatory, preheating – typically 3-5 minutes – ensures even cooking and enhanced crispiness. The manual details how to activate the preheating function, often a dedicated button or setting within the Smart Programs.

Beyond preheating, the manual outlines various cooking modes, including Air Fry, Roast, Bake, Reheat, and Dehydrate. Each mode is designed for specific food types and cooking styles. The Air Fry mode utilizes rapid air circulation for crispy textures, while Roast is suited for larger cuts of meat.

Understanding the nuances of each mode is crucial. The manual provides detailed explanations of how each mode functions, including temperature ranges and recommended cooking times. Experimentation, guided by the manual’s recommendations, allows users to master each cooking mode and achieve desired outcomes.

Air Fry, Roast, Bake, Reheat & Dehydrate

The Instant Pot Air Fryer manual dedicates significant detail to its versatile cooking functions. Air Fry delivers crispy results using rapid air circulation, ideal for fries and snacks. Roast excels with meats, achieving browned exteriors and juicy interiors. Bake functions similarly to a conventional oven, perfect for cakes and pastries.

The Reheat function gently warms leftovers without overcooking, restoring texture. Dehydrate, a slower process, removes moisture for making jerky or dried fruits. The manual provides specific temperature and time guidelines for each function, serving as a starting point for experimentation.

It emphasizes that these are presets, and adjustments may be needed based on food quantity and desired doneness. The manual also highlights the importance of using appropriate accessories for each mode, maximizing efficiency and ensuring optimal results. Understanding these distinctions unlocks the full potential of your Instant Pot Air Fryer.

Using Your Instant Pot Air Fryer

The manual guides users through the process of preparing food and operating the air fryer safely and effectively, maximizing its capabilities for delicious results.

Preparing Food for Air Frying

Proper food preparation is crucial for achieving optimal results with your Instant Pot Air Fryer. The official manual emphasizes the importance of ensuring food is adequately seasoned and, where necessary, lightly coated with oil to promote even cooking and crisping.

For frozen foods, the manual advises against thawing unless specifically indicated in a recipe, as this can affect the final texture. Fresh foods may benefit from a light toss in oil and spices before air frying.

Pay close attention to food size and arrangement within the basket; overcrowding can hinder airflow and lead to unevenly cooked results. The manual provides guidance on appropriate quantities for different food types.

Furthermore, the PDF manual details specific preparation techniques for various ingredients, including meats, vegetables, and baked goods, ensuring you unlock the full potential of your air fryer.

Basket & Tray Usage

The Instant Pot Air Fryer manual provides detailed instructions on utilizing the basket and tray accessories effectively. It highlights the importance of ensuring the basket is securely placed within the air fryer before operation, preventing food from falling into the heating element.

The manual clarifies that certain models feature a multi-level rack system, allowing for increased cooking capacity and versatile food arrangement. It stresses the need to avoid overfilling the basket or tray, maintaining adequate space for proper air circulation.

Cleaning instructions for both the basket and tray are also included, recommending hand washing with warm, soapy water or dishwasher use (if indicated in the manual). The PDF emphasizes avoiding abrasive cleaners that could damage the non-stick coating.

Proper basket and tray usage, as outlined in the manual, is key to maximizing cooking efficiency and ensuring food safety.

Cooking Times & Temperatures (General Guidelines)

The Instant Pot Air Fryer manual offers a foundational chart of cooking times and temperatures for common foods. However, it consistently emphasizes these are general guidelines, and adjustments are often necessary based on food quantity, thickness, and desired crispness.

The manual typically includes starting points for items like french fries, chicken wings, vegetables, and frozen snacks. It advises users to consult the chart as a base and then experiment to achieve personalized results.

The PDF stresses the importance of checking food for doneness using a food thermometer, particularly for meats, to ensure they reach safe internal temperatures. It also suggests shaking or flipping food halfway through the cooking process for even browning.

Remember, the manual encourages users to leverage the Smart Programs as a starting point, then refine times and temperatures for optimal outcomes.

Safety Precautions & Warnings

The Instant Pot Air Fryer manual dedicates significant space to safety instructions, emphasizing the appliance operates at high temperatures. It warns against touching hot surfaces, utilizing oven mitts for basket and tray handling, and ensuring proper ventilation during operation.

The PDF explicitly cautions against immersing the unit in water or any liquid, highlighting the risk of electric shock. It also advises users to never operate the appliance with a damaged cord or plug and to unplug it when not in use.

The manual stresses the importance of supervising children when the air fryer is in use, and keeping them away from hot surfaces. It also warns against using the appliance outdoors or for commercial purposes.

Always refer to the detailed safety section within your specific model’s manual for comprehensive guidance and to prevent potential hazards.

Troubleshooting Common Issues

The Instant Pot air fryer manual PDF provides solutions for typical problems, like heating failures or uneven cooking. Error codes are explained, alongside cleaning and maintenance guidance.

Air Fryer Not Heating

If your Instant Pot air fryer isn’t heating, the manual PDF is your first resource. Begin by verifying the power cord is securely connected to a functioning outlet. Consult the manual’s troubleshooting section for specific error codes displayed, as these pinpoint the issue.

Ensure the air fryer basket is correctly inserted and locked into place; a safety mechanism prevents operation if improperly seated. Check if the timer is set or if a Smart Program is selected – the unit won’t heat without an active setting. The manual details reset procedures if the control panel is unresponsive.

Review the manual’s safety instructions regarding overheating protection; the unit may temporarily shut off if it gets too hot. Finally, the PDF manual provides contact information for Instant Pot customer support if the problem persists, offering further assistance and potential repair options.

Food Not Cooking Evenly

Uneven cooking in your Instant Pot air fryer often stems from overcrowding the basket. The manual PDF emphasizes the importance of arranging food in a single layer, allowing for proper air circulation. Refer to the manual’s guidelines for maximum capacity recommendations for different food types.

Regularly shaking or flipping the food midway through the cooking process, as detailed in the manual, promotes even browning and crisping. Ensure the air fryer isn’t placed too close to walls or cabinets, restricting airflow. The manual’s section on basket and tray usage clarifies proper placement for optimal results.

Experiment with slightly lower temperatures and extended cooking times, referencing the manual’s general guidelines. If issues persist, consult the manual’s troubleshooting section for specific food-related tips and potential solutions.

Error Codes & Their Meanings

The Instant Pot air fryer’s manual PDF provides a comprehensive list of error codes and their corresponding solutions. These codes signal potential issues, ranging from sensor malfunctions to heating element problems. Ignoring these alerts can lead to suboptimal performance or even damage to the appliance.

Common error codes, detailed within the manual, might indicate a temperature sensor failure or an issue with the heating component. The manual instructs users to first attempt a simple reset – unplugging and replugging the device. If the error persists, the manual advises against self-repair and recommends contacting Instant Pot customer support.

Always consult the manual’s specific error code table for accurate diagnosis and troubleshooting steps. The manual also outlines warranty information should a more serious issue require professional attention.

Cleaning & Maintenance

The Instant Pot air fryer manual PDF emphasizes regular cleaning for optimal performance and longevity. It details a step-by-step process, highlighting dishwasher-safe components like the basket and tray. However, the manual cautions against abrasive cleaners, which can damage the non-stick coating.

The manual specifically advises unplugging the appliance and allowing it to cool completely before cleaning. It recommends wiping down the exterior with a damp cloth and avoiding water entering the internal components. For stubborn food residue, a mild detergent solution is suggested.

Detailed instructions within the manual cover cleaning the heating element and fan, ensuring proper airflow. Regular maintenance, as outlined in the PDF, prevents buildup and maintains cooking efficiency. Ignoring these guidelines may void the warranty.

Advanced Techniques & Recipes

The Instant Pot air fryer manual PDF unlocks culinary creativity, offering app integration, recipe exploration, program customization, and tips for achieving perfectly crispy, delicious results.

Using the Instant Pot App with Your Air Fryer

The Instant Pot app significantly enhances your air frying experience, offering a vast library of over 1900 recipes specifically tailored for Instant Pot air fryers. The manual PDF often details how to connect your appliance to the app via Wi-Fi, enabling remote control and monitoring of cooking progress.

Through the app, you can browse recipes by category, dietary restriction, or ingredient, and send cooking instructions directly to your air fryer. Many recipes include step-by-step guidance, complete with photos and videos.

Furthermore, the app allows you to customize cooking programs, save your favorite settings, and receive notifications when your food is ready. It’s a powerful tool for expanding your culinary repertoire and simplifying the air frying process, as highlighted in various user manuals and online resources. The app truly unlocks the full potential of your Instant Pot air fryer.

Exploring Different Recipes

The Instant Pot air fryer excels at recreating favorite foods with less oil, and the manual PDF often includes a starter set of recipes. However, the true potential lies in exploring the diverse range of possibilities. From crispy french fries and chicken wings to roasted vegetables and baked goods, the appliance is remarkably versatile.

Many online resources and recipe websites offer air fryer-specific instructions, adapting traditional recipes for optimal results. The Instant Pot app, as detailed in the appliance’s documentation, provides access to over 1900 recipes, continually expanding your culinary horizons.

Experimenting with different seasonings, marinades, and cooking times allows for personalized creations. Don’t be afraid to adjust temperatures and durations based on your preferences, referencing the manual for general guidelines. Mastering various recipes transforms your Instant Pot air fryer into a kitchen essential.

Customizing Cooking Programs

While Instant Pot air fryers boast pre-set “Smart Programs,” the manual PDF emphasizes the ability to tailor cooking to individual preferences. Understanding temperature and time controls is crucial for customization. The manual details how to adjust these settings, allowing for precise cooking based on food type and desired crispness.

Experimentation is key; start with recommended settings and adjust incrementally. The manual often provides guidance on how different foods respond to varying temperatures and durations. For example, thicker cuts of meat may require longer cooking times at lower temperatures to ensure thorough cooking without burning.

Documenting successful customizations creates a personal recipe library. The Instant Pot app, referenced in the manual, can also store customized programs for easy recall. Mastering program customization unlocks the full potential of your air fryer.

Tips for Crispy Results

Achieving perfectly crispy results with your Instant Pot air fryer often requires understanding a few key techniques, detailed within the manual PDF. Avoiding overcrowding the basket is paramount; ensure adequate air circulation for even cooking. Lightly coating food with oil – using an oil sprayer is recommended – promotes browning and crisping.

The manual suggests flipping or tossing food halfway through the cooking process for uniform crispness. For breaded items, ensure the coating adheres well to prevent it from blowing off during air frying. Preheating the air fryer, as outlined in the manual, also contributes to superior results.

Experiment with different cooking times and temperatures to find the sweet spot for your favorite foods. The manual’s general guidelines serve as a starting point, but personal preference is key.

Manual Specific Sections

The Instant Pot air fryer manual PDF contains vital sections, including detailed safety instructions, a comprehensive parts identification diagram, warranty details, and precise technical specifications.

Safety Instructions (Detailed)

Prioritizing safety is paramount when operating your Instant Pot air fryer. The manual’s safety section provides crucial guidelines to prevent hazards. Always ensure the appliance is properly grounded and used on a stable, heat-resistant surface. Never immerse the unit in water or any other liquid.

Avoid operating the air fryer with a damaged cord or plug. Do not touch hot surfaces; utilize oven mitts or handles. Keep the air fryer away from flammable materials during operation. Never leave the appliance unattended while in use.

Exercise caution when opening the basket or tray, as hot steam may escape. Ensure proper ventilation around the unit. Do not attempt to repair the appliance yourself; contact qualified service personnel. Read all warnings and instructions thoroughly before first use, and retain the manual for future reference. Failure to adhere to these safety guidelines could result in injury or damage.

Parts Identification Diagram

The Instant Pot air fryer manual includes a detailed parts identification diagram, essential for understanding your appliance’s components. This visual guide clearly labels each part, facilitating proper usage and maintenance. Key components typically include the main unit housing, the air fry basket, the crisping tray, and the control panel.

The diagram also highlights the heating element, fan, and ventilation areas. Familiarizing yourself with these parts is crucial for safe operation and troubleshooting. It showcases the location of removable components for easy cleaning, such as the basket and tray.

Referencing this diagram helps identify parts requiring replacement or attention. Understanding the arrangement of these components aids in proper assembly and disassembly. The manual’s diagram ensures you can confidently navigate your Instant Pot air fryer’s anatomy, maximizing its functionality and lifespan.

Warranty Information

The Instant Pot air fryer manual’s warranty section details the coverage provided with your appliance. Typically, Instant Pot offers a limited warranty against defects in materials and workmanship for a specified period, often one year from the date of purchase. This warranty generally covers functional parts but may not include cosmetic damage or issues arising from misuse.

To make a claim, you’ll likely need to provide proof of purchase and a detailed description of the defect. The manual outlines the process for contacting Instant Pot customer support and initiating a warranty request. It’s crucial to register your product online to streamline the warranty process.

Reviewing the warranty terms carefully is essential to understand your rights and responsibilities. The manual specifies what voids the warranty, such as unauthorized repairs or modifications. Keeping your purchase receipt and the warranty information readily available ensures a smooth experience should any issues arise.

Technical Specifications

The Instant Pot air fryer manual’s technical specifications section provides crucial details about your appliance’s capabilities. This includes the voltage, wattage, and frequency requirements, ensuring compatibility with your household electrical system. You’ll find information on the air fryer’s capacity, typically measured in quarts or liters, indicating the maximum food volume it can accommodate.

The manual also lists the dimensions and weight of the unit, helpful for determining placement and portability. Temperature range, from the lowest warming setting to the highest cooking temperature, is clearly stated. Furthermore, it details the timer’s maximum duration, allowing for extended cooking processes like dehydration.

Specific models may include additional specifications, such as the heating element type and the basket material. Understanding these technical details is vital for safe and efficient operation, and for troubleshooting potential issues. Referencing this section ensures you’re using the air fryer within its designed parameters.


nj driving manual pdf

Category : Manuals

New Jersey Driving Manual PDF: A Comprehensive Guide (Updated March 14, 2026)

This comprehensive guide, updated today, March 14, 2026, offers crucial details regarding New Jersey driver licensing, testing, and safe driving regulations in a readily accessible PDF format.

The New Jersey Driving Manual serves as the official resource for all aspiring and current drivers within the state. This vital document, available as a PDF, meticulously outlines the requirements for obtaining a New Jersey driver license, detailing the necessary testing procedures and emphasizing safe driving practices. It’s a cornerstone for understanding New Jersey’s traffic laws and regulations, ensuring drivers are well-informed and prepared for the responsibilities of operating a vehicle.

This manual isn’t merely a compilation of rules; it’s a comprehensive guide designed to promote road safety for everyone. It covers essential topics, from understanding traffic signs and signals to navigating various driving conditions. The information contained within is regularly updated, with the current version reflecting changes as of March 14, 2026, ensuring drivers have access to the most current and accurate information available. It’s based on work supported by the Federal Motor Carrier Safety Administration.

Why Use the Official NJ Driving Manual PDF?

Utilizing the official New Jersey Driving Manual PDF is paramount for several reasons. Firstly, it guarantees access to the most accurate and up-to-date information regarding state-specific driving laws, regulations, and procedures. Unlike unofficial sources, the NJMVC-provided manual reflects the latest legislative changes, ensuring you’re studying current material;

Secondly, the PDF format offers unparalleled convenience – it’s readily accessible on various devices, allowing for study anytime, anywhere. This manual, copyrighted 2022 by AAMVA, is based on work supported by the Federal Motor Carrier Safety Administration. It’s crucial for preparing for both the knowledge and road tests, providing a solid foundation for safe and legal driving. Relying on the official manual minimizes the risk of misinformation and maximizes your chances of success, ultimately contributing to safer roads for all New Jersey drivers.

Where to Download the Official NJ Driving Manual PDF

The official New Jersey Driving Manual PDF is readily available for download directly from the New Jersey Motor Vehicle Commission (NJMVC) website. This is the most reliable source to ensure you obtain the current, authorized version – crucial as regulations are subject to change.

Accessing the manual is straightforward; navigate to the NJMVC’s official online portal and locate the “Driver Information” or “Publications” section. From there, you’ll find a direct link to download the PDF. Remember, this document, with copyright 2022 AAMVA, is supported by the Federal Motor Carrier Safety Administration. Avoid downloading from unofficial third-party websites to prevent accessing outdated or inaccurate information. Always verify you are on the official NJMVC site for the most dependable resource for your driver’s education needs.

Understanding New Jersey Driver Licensing

New Jersey offers diverse driver licenses, including learner permits and graduated licenses, detailed within the official manual for aspiring and current drivers alike.

Types of New Jersey Driver Licenses

New Jersey’s Motor Vehicle Commission (NJMVC) issues a variety of driver licenses to accommodate different needs and driving privileges. Basic driver licenses are the standard credential for fully licensed drivers, while learner permits allow individuals to practice driving under supervision. The Graduated Driver License (GDL) program features provisional licenses with specific restrictions for new drivers.

Commercial Driver Licenses (CDLs) are required for operating large commercial vehicles, with various endorsements for specific cargo or passenger transport. Additionally, the NJMVC offers non-driver identification cards for individuals who do not drive but require official photo identification. The official NJ Driving Manual PDF comprehensively details each license type, outlining eligibility requirements, application procedures, and associated fees. Understanding these distinctions is crucial for navigating New Jersey’s licensing system effectively.

Graduated Driver License (GDL) Program Overview

New Jersey’s Graduated Driver License (GDL) program is a multi-stage process designed to safely introduce new drivers to the road. It begins with a learner’s permit, requiring supervised driving practice. Next, a provisional license is issued with restrictions on nighttime driving and passenger limits. These restrictions gradually ease as the driver gains experience and maintains a clean driving record.

The NJ Driving Manual PDF provides a detailed breakdown of each GDL stage, including specific requirements for practice hours, testing procedures, and permissible driving conditions. Successful completion of each stage is essential before progressing to a full, unrestricted driver license. The program aims to minimize risks associated with inexperienced drivers, promoting responsible driving habits from the outset.

Special Learner Permits & Restrictions

The New Jersey Driving Manual PDF outlines various special learner permits available, catering to specific circumstances. These include permits for motorcycle learners and commercial learner permits, each with unique requirements and restrictions. Regardless of the permit type, all learner’s permit holders must be accompanied by a supervising driver who meets specific criteria, as detailed in the manual.

Restrictions commonly apply to learner permit holders, including limitations on driving hours (no unsupervised driving between 11:01 PM and 5:00 AM) and passenger limits. The manual clearly defines these restrictions and the penalties for violations. Understanding these rules is crucial for safe and legal driving practice during the learning phase, ensuring compliance with New Jersey law.

Preparing for the NJ Knowledge Test

The NJ Driving Manual PDF is your primary resource for mastering the knowledge test, covering vital traffic laws, signals, and safe driving practices for success.

Key Topics Covered on the Knowledge Test

The New Jersey knowledge test, comprehensively detailed within the official NJ Driving Manual PDF, assesses your understanding of crucial driving principles and state-specific regulations. Expect questions focusing on traffic laws, including speed limits, right-of-way rules, and proper lane usage. A significant portion evaluates your recognition of traffic signs and signals – from regulatory and warning signs to guide markers.

Furthermore, the test delves into safe driving practices, such as maintaining a safe following distance, proper turning procedures, and hazard perception. Understanding New Jersey’s laws regarding alcohol and drugs is paramount, as is knowledge of distracted driving regulations, particularly concerning cell phone use. The manual PDF also prepares you for questions related to pedestrian and cyclist safety, and emergency procedures. Thoroughly reviewing the manual ensures you’re well-equipped to demonstrate a solid grasp of these essential topics.

Practice Knowledge Test Questions & Resources

To effectively prepare for the NJ knowledge test, utilizing practice questions is invaluable. The official NJ Driving Manual PDF doesn’t directly include a full practice test, but numerous third-party resources offer simulated exams mirroring the test’s format and difficulty. These resources, readily available online, allow you to assess your understanding of the material and identify areas needing further study.

Many websites provide free practice tests, while others offer more comprehensive paid courses. Remember to verify the resource’s accuracy and ensure it aligns with the current NJ Driving Manual PDF (updated March 14, 2026). Focus on understanding the reasoning behind correct answers, not just memorizing them. Supplement these tests with a thorough review of the manual, paying close attention to sections on traffic laws, signs, and safe driving techniques. Consistent practice builds confidence and increases your chances of success.

Understanding Traffic Signs & Signals

The NJ Driving Manual PDF places significant emphasis on recognizing and interpreting traffic signs and signals, a critical component of the knowledge test. Signs are categorized by shape and color – regulatory, warning, and guide signs – each conveying specific instructions or information. Mastering these visual cues is paramount for safe driving.

The manual details the meaning of each sign, including those related to speed limits, lane usage, and potential hazards. Understanding traffic signals, including steady, flashing, and arrow indications, is equally vital. Pay close attention to the sections covering right-of-way rules at intersections and pedestrian crossings. Practice identifying signs and signals in various scenarios to reinforce your knowledge. Resources supplementing the PDF often include interactive quizzes focused solely on sign recognition, aiding in effective preparation.

Mastering the NJ Road Test

The NJ Driving Manual PDF thoroughly prepares drivers for the road test, detailing vehicle inspection requirements, common mistakes, and scoring criteria for evaluation.

Road Test Requirements & Vehicle Inspection

Successfully navigating the New Jersey road test demands meticulous preparation, and the official NJ Driving Manual PDF is your essential guide. Before even starting the engine, a comprehensive vehicle inspection is mandatory. This includes verifying operational headlights, brake lights, turn signals, and a functioning horn.

The examiner will scrutinize tire condition, ensuring adequate tread depth, and confirm the proper operation of windshield wipers. Documentation, like current registration and insurance, must be readily available. During the test itself, drivers are evaluated on fundamental skills – smooth acceleration, controlled braking, precise steering, and safe lane changes.

Parallel parking, three-point turns, and obeying all traffic signals are critical components. The NJ Driving Manual PDF provides detailed illustrations and explanations of each maneuver, boosting confidence and maximizing your chances of passing; Remember, a well-maintained vehicle and a thorough understanding of the manual’s guidance are key to success.

Common Road Test Mistakes to Avoid

The New Jersey road test, detailed within the NJ Driving Manual PDF, often trips up even prepared drivers. A frequent error is insufficient observation – failing to check mirrors and blind spots consistently. Hesitation at intersections, or rolling stops, are immediate deductions.

Incorrect signaling, especially during lane changes or turns, is another common mistake. Drivers often struggle with maintaining a consistent speed, either too fast or excessively slow for conditions. Poor parallel parking technique, hitting cones, or excessive corrections are significant errors.

The manual emphasizes the importance of smooth braking and acceleration; jerky movements indicate a lack of control. Finally, neglecting to yield the right-of-way, or displaying a general lack of confidence, can lead to failure. Reviewing the NJ Driving Manual PDF thoroughly will help you anticipate and avoid these pitfalls.

Road Test Scoring & Evaluation Criteria

The New Jersey Motor Vehicle Commission (NJMVC), as outlined in the NJ Driving Manual PDF, employs a standardized scoring system for the road test. Examiners assess a broad range of skills, assigning points for each successfully executed maneuver. Critical areas include observation, signaling, lane control, speed management, and adherence to traffic laws.

Minor errors, like slight hesitation or imperfect lane positioning, result in point deductions. However, a single critical error – such as failing to yield or causing a dangerous situation – leads to immediate failure. The manual details specific point values for each infraction.

A passing score requires accumulating a predetermined number of points, demonstrating safe and competent driving ability. Reviewing the evaluation criteria within the NJ Driving Manual PDF is crucial for understanding expectations and maximizing your chances of success.

Traffic Laws & Regulations in New Jersey

The NJ Driving Manual PDF meticulously details New Jersey’s traffic laws, covering speed limits, right-of-way rules, and stringent regulations regarding alcohol and drug-impaired driving.

Speed Limits & Right-of-Way Rules

The New Jersey Driving Manual PDF provides a detailed breakdown of speed limits across various roadways, including highways, parkways, and residential areas, emphasizing the importance of adhering to posted limits for safety. It clearly outlines the fundamental right-of-way rules at intersections, covering scenarios involving stop signs, yield signs, and uncontrolled intersections.

Understanding these rules is crucial for preventing collisions; The manual explains yielding to pedestrians, emergency vehicles, and other drivers appropriately. It also addresses specific right-of-way situations, such as merging onto highways and navigating roundabouts. Furthermore, the PDF clarifies laws concerning passing other vehicles, including restrictions based on lane markings and visibility. Drivers are instructed on safe following distances and the importance of adjusting speed based on weather conditions. Mastering these regulations, as detailed in the manual, is essential for responsible driving in New Jersey.

New Jersey’s Laws Regarding Alcohol & Drugs

The New Jersey Driving Manual PDF dedicates significant coverage to the state’s stringent laws concerning driving under the influence of alcohol or drugs. It clearly defines the legal blood alcohol concentration (BAC) limit and outlines the severe penalties for exceeding it, including fines, license suspension, and potential jail time.

The manual emphasizes that even small amounts of alcohol can impair driving ability. It details New Jersey’s implied consent laws, meaning drivers automatically consent to BAC testing if lawfully arrested. Furthermore, the PDF comprehensively addresses the dangers and illegality of driving under the influence of controlled dangerous substances, including prescription and over-the-counter medications that may cause impairment. It stresses the importance of responsible decision-making and utilizing alternative transportation options when alcohol or drugs are involved, promoting road safety for all.

Cell Phone Use & Distracted Driving Laws

The New Jersey Driving Manual PDF provides detailed information regarding the state’s laws concerning cell phone use and other forms of distracted driving. It explicitly prohibits handheld cell phone use while operating a vehicle, emphasizing the significant safety risks associated with diverting attention from the road.

The manual clarifies permitted uses, such as hands-free devices, and outlines penalties for violations, including fines and points on your driving record. Beyond cell phones, the PDF broadly addresses distracted driving, encompassing activities like texting, eating, and adjusting vehicle controls. It stresses the importance of maintaining focus on driving and encourages drivers to eliminate distractions to prevent accidents. The manual underscores that responsible driving demands undivided attention, safeguarding both the driver and other road users.

Safe Driving Practices in New Jersey

The New Jersey Driving Manual PDF emphasizes defensive driving, pedestrian/cyclist awareness, and adapting to adverse weather, ensuring driver and passenger safety.

Defensive Driving Techniques

The New Jersey Driving Manual PDF strongly advocates for proactive defensive driving techniques to mitigate risks on the road. This includes maintaining a safe following distance, consistently scanning the road ahead, to the sides, and checking mirrors frequently. Drivers are urged to anticipate potential hazards, recognizing that other drivers may make errors.

Effective space management is crucial; drivers should create a “space cushion” around their vehicle. Being aware of blind spots and signaling intentions clearly are also vital components. The manual emphasizes avoiding distractions, like cell phone use, and remaining alert to changing road conditions.

Furthermore, it stresses the importance of adjusting driving behavior based on weather, traffic density, and the presence of vulnerable road users, such as pedestrians and cyclists. Practicing these techniques significantly reduces the likelihood of collisions and promotes a safer driving environment for everyone.

Sharing the Road with Pedestrians & Cyclists

The New Jersey Driving Manual PDF dedicates significant attention to safely sharing roadways with pedestrians and cyclists, emphasizing driver responsibility. Drivers must yield the right-of-way to pedestrians in crosswalks, whether marked or unmarked, and be especially cautious near schools and residential areas.

When approaching cyclists, drivers are required to maintain a safe distance – at least four feet when passing – and reduce speed. The manual highlights the importance of checking blind spots before turning or changing lanes, as cyclists can be easily obscured.

Drivers should anticipate unpredictable movements from both pedestrians and cyclists and avoid aggressive driving behaviors. Increased awareness and respect for vulnerable road users are paramount to preventing accidents and fostering a safer transportation system for all in New Jersey.

Driving in Adverse Weather Conditions

The New Jersey Driving Manual PDF provides detailed guidance on navigating challenging weather conditions, crucial for safety. Drivers are advised to reduce speed significantly during rain, snow, fog, or ice, increasing following distance to allow ample stopping time.

Headlights should be used in all reduced visibility situations, and windshield wipers must be in good working order. The manual specifically warns against using cruise control on slippery roads, as it can reduce driver control.

In snowy or icy conditions, drivers should avoid sudden braking or steering maneuvers. If a vehicle begins to skid, the manual instructs drivers to ease off the accelerator and steer in the direction of the skid. Preparation and cautious driving are key to mitigating risks during adverse weather.

Commercial Driver License (CDL) Information

The CDL manual, version March 2025, details requirements, endorsements, and restrictions for operating commercial vehicles in New Jersey, based on FMCSA guidelines.

CDL Manual Version: March 2025

The Commercial Driver License (CDL) manual, specifically the March 2025 version, serves as the definitive resource for individuals seeking to obtain or upgrade their commercial driving privileges within the state of New Jersey. This document, copyrighted 2022 by AAMVA, meticulously outlines all aspects of CDL acquisition and operation;

It’s developed with support from the Federal Motor Carrier Safety Administration (FMCSA) and covers essential topics like vehicle inspection, safe driving practices tailored for larger commercial vehicles, and a detailed explanation of various CDL endorsements. Understanding this manual is paramount for passing the CDL knowledge and skills tests.

The manual’s content is regularly updated to reflect changes in federal and state regulations, ensuring drivers are equipped with the most current information. It’s a critical tool for promoting highway safety and responsible commercial transportation throughout New Jersey.

Requirements for Obtaining a CDL in New Jersey

Securing a Commercial Driver’s License (CDL) in New Jersey involves a multi-step process designed to ensure driver competency and public safety. Applicants must first meet specific age requirements and possess a valid New Jersey driver’s license. A thorough medical examination, documented with a Medical Examiner’s Certificate, is mandatory to confirm physical qualifications for commercial operation.

Prospective CDL holders must successfully pass both a knowledge test, covering federal and state regulations, and a skills (road) test demonstrating proficiency in operating a commercial vehicle.

Applicants are required to complete a CDL application and provide necessary documentation verifying identity, residency, and legal authorization to work in the United States. Background checks are also conducted. Adherence to these requirements, detailed in the March 2025 CDL manual, is crucial for a successful application.

CDL Endorsements & Restrictions

New Jersey CDL holders may need specific endorsements to operate certain types of commercial vehicles or transport particular hazardous materials. Common endorsements include those for tank vehicles, hazardous materials (HazMat), and passenger transport, each requiring a dedicated knowledge test. Obtaining these endorsements expands operational capabilities but necessitates specialized training and adherence to strict regulations.

Conversely, CDL licenses can also carry restrictions, limiting the types of vehicles an individual can operate or requiring corrective lenses for vision impairment. These restrictions are based on individual assessments and ensure drivers meet the necessary standards for safe operation.

The March 2025 CDL manual comprehensively details all available endorsements and potential restrictions, providing clear guidance for drivers seeking to expand their qualifications or understand their license limitations.

Additional Resources & Information

Explore the NJMVC website for the latest updates, alongside AAMVA copyright details (2022), and valuable safety resources from the Federal Motor Carrier Safety Administration.

New Jersey Motor Vehicle Commission (NJMVC) Website

The New Jersey Motor Vehicle Commission (NJMVC) website serves as the primary hub for all things related to driver licensing and vehicle registration within the state. It’s the definitive source for accessing the official NJ Driving Manual PDF, ensuring you have the most current information available. Beyond the manual, the NJMVC website provides access to online services, including license renewal, vehicle registration, and appointment scheduling.

You can find detailed explanations of licensing requirements, testing procedures, and frequently asked questions. The site also offers downloadable forms and publications, streamlining the application process. Regularly checking the NJMVC website is crucial, as laws and regulations are subject to change. Staying informed through this official channel guarantees compliance and a smooth experience navigating New Jersey’s driving landscape. It’s a vital resource for both new and experienced drivers alike.

AAMVA Copyright Information (2022)

The New Jersey NJ Driving Manual PDF, like many driver handbooks across the nation, incorporates material developed with support from the American Association of Motor Vehicle Administrators (AAMVA). Copyright for this foundational content rests with AAMVA, established in 2022, safeguarding their intellectual property rights. This signifies a collaborative effort to standardize driver education resources nationwide.

The NJMVC utilizes AAMVA’s work, adapting it to specifically address New Jersey’s unique traffic laws and regulations. All rights are reserved by AAMVA, meaning reproduction or distribution of the manual’s core content without permission is prohibited. This copyright protection ensures the accuracy and integrity of the information provided to drivers. The manual’s development also benefits from grant funding from the Federal Motor Carrier Safety Administration, further emphasizing its commitment to road safety.

Federal Motor Carrier Safety Administration (FMCSA) Resources

The creation and maintenance of the NJ Driving Manual PDF, particularly sections pertaining to Commercial Driver Licensing (CDL), receive vital support from the Federal Motor Carrier Safety Administration (FMCSA). This agency plays a crucial role in enhancing commercial vehicle safety across the United States, and their resources are integrated into the New Jersey manual.

FMCSA provides grant funding that assists in developing and updating the CDL manual, ensuring it aligns with federal regulations and best practices. Drivers seeking a CDL in New Jersey can access supplementary information and training materials directly from the FMCSA website. These resources cover topics like vehicle inspection, safe driving techniques, and hazardous materials handling. Utilizing FMCSA’s offerings alongside the NJ manual is highly recommended for comprehensive CDL preparation.


  • 0

liftmaster sl3000ul manual

Category : Manuals

LiftMaster SL3000UL Manual: A Comprehensive Guide

This 52-page manual, in English, details the SL3000UL for vehicular gates only. It offers technical specifications and guidance, rated 8.1/10 by users as of February 2025.

The LiftMaster SL3000UL is a gate operator specifically designed for vehicular passage gates. This comprehensive manual serves as a vital resource for owners, installers, and maintenance personnel. It provides detailed instructions, safety precautions, and troubleshooting guidance. Understanding this manual ensures proper installation, operation, and longevity of your gate system. The SL3000UL boasts robust features and reliable performance, making it a popular choice for residential and commercial applications.

Safety Precautions and Warnings

Prioritize safety during installation and operation of the SL3000UL. This manual emphasizes critical warnings to prevent serious injury or death. Always disconnect power before servicing. Ensure safety devices, like photo eyes and edge sensors, function correctly. Never allow children to operate or play near the gate. Improper installation or maintenance voids the warranty and increases risk. Adherence to all instructions is paramount for safe and reliable gate operation.

Understanding the SL3000UL Components

The LiftMaster SL3000UL system comprises several key elements. These include the gate operator unit itself, responsible for moving the gate. A control board manages operation and safety features, requiring careful wiring. Crucially, safety devices – photo eyes and edge sensors – prevent gate closure on obstructions. Familiarity with each component’s function and interconnection is essential for proper installation, programming, and troubleshooting of the entire system.

Gate Operator Unit

The SL3000UL’s gate operator unit is the core mechanical component. Designed exclusively for vehicular passage gates, it provides the power to open and close the gate smoothly. Proper mounting is critical for stable operation; This unit interfaces directly with the control board, receiving signals to initiate movement and responding to safety device inputs. Regular inspection of the unit’s physical condition is vital for longevity.

Control Board and Wiring

The LiftMaster SL3000UL’s control board serves as the system’s brain. It processes signals from safety devices, remotes, and timers to manage gate operation. Careful wiring is essential; follow the manual’s diagrams precisely. Incorrect connections can cause malfunctions or safety hazards. The board manages travel limits and obstruction sensitivity settings, crucial for safe and reliable performance.

Safety Devices (Photo Eyes, Edge Sensors)

The SL3000UL relies on safety devices like photo eyes and edge sensors to prevent accidents. Photo eyes create an invisible beam; if broken, the gate reverses. Edge sensors, installed on the gate, detect obstructions and trigger reversal. Proper alignment and testing of these devices are critical for safe operation, as outlined in the manual. Malfunctions require immediate attention and troubleshooting.

Installation Procedures

The manual details a multi-step installation process for the SL3000UL. This includes securely mounting the gate operator, carefully wiring the control board, and correctly connecting safety devices. Precise adherence to the instructions is crucial for functionality and safety. Professional installation is recommended if you lack experience with electrical systems and gate operators.

Mounting the Gate Operator

Proper mounting is fundamental for stable operation. The SL3000UL requires a robust and level mounting surface capable of supporting its weight and resisting operational forces. The manual provides detailed diagrams and specifications for bracket placement and secure fastening. Ensure all hardware is tightened to the manufacturer’s torque specifications to prevent vibration and potential failure during gate operation.

Wiring the Control Board

Careful wiring is crucial for correct functionality. The SL3000UL control board requires precise connections for power, safety devices, and gate motor. The manual includes detailed wiring diagrams, identifying each terminal and its purpose. Always disconnect power before making any connections, and use appropriately sized wiring according to local electrical codes. Double-check all connections before restoring power.

Connecting Safety Devices

Proper safety device connection is paramount for preventing accidents. The LiftMaster SL3000UL utilizes photo eyes and edge sensors. The manual provides step-by-step instructions for wiring these devices to the control board, ensuring they function correctly. Accurate alignment and testing are essential; obstructions must trigger a gate reversal. Incorrect wiring can compromise safety features, so follow the diagrams meticulously.

Programming and Setup

The SL3000UL requires precise programming for optimal operation. This section of the manual details setting travel limits to define the gate’s open and closed positions. Adjusting obstruction sensitivity ensures the gate responds appropriately to obstacles. Crucially, the manual guides users through remote control programming, enabling secure access. Careful setup is vital for safety and convenience.

Setting Travel Limits

Accurate travel limit settings are fundamental to the SL3000UL’s functionality. The manual instructs users on defining the precise open and closed positions of the gate. This prevents over-travel and potential damage. Proper adjustment ensures smooth, reliable operation. Incorrect settings can compromise safety features and necessitate recalibration, so follow the manual closely.

Adjusting Obstruction Sensitivity

The SL3000UL’s obstruction sensitivity is a crucial safety feature. The manual details how to fine-tune this setting, ensuring the gate reverses upon encountering an obstacle. Too low, and the system may not react; too high, and it could cause unnecessary reversals. Careful adjustment balances safety and operational efficiency, preventing potential damage or injury.

Remote Control Programming

The LiftMaster SL3000UL manual provides clear instructions for programming remote controls. This process typically involves accessing the control board and utilizing a “learn” button. Each remote must be individually programmed to communicate with the gate operator. The manual details troubleshooting steps for unsuccessful programming attempts, ensuring seamless access control for authorized users.

Troubleshooting Common Issues

The LiftMaster SL3000UL manual dedicates a section to resolving frequent problems. It addresses scenarios like a gate failing to respond, safety device malfunctions, and remote control difficulties. Detailed diagnostic steps are provided, guiding users through potential causes and solutions. This section aims to minimize downtime and ensure continued, reliable gate operation, referencing the control board frequently.

Gate Not Responding

If the SL3000UL gate isn’t responding, the manual suggests checking power supply and wiring connections first. Verify the control board has power and that no breakers are tripped. Inspect remote control batteries and reprogram if necessary. Obstruction sensitivity settings and safety device functionality should also be tested, as these can halt operation. A thorough review of these elements is crucial.

Safety Device Malfunctions

The LiftMaster SL3000UL manual emphasizes safety device checks when issues arise. Malfunctions with photo eyes or edge sensors will prevent gate operation. Ensure proper alignment and clear obstructions from the sensor beams. Wiring connections to the control board must be secure. If problems persist, consult the manual’s troubleshooting section for specific error codes and solutions, prioritizing safety.

Remote Control Problems

The LiftMaster SL3000UL manual details remote programming procedures. If a remote isn’t functioning, first check the battery. Reprogramming may be necessary if the remote becomes unpaired. Interference can also cause issues; ensure no other devices are transmitting on the same frequency. Consult the manual for specific troubleshooting steps and compatibility information regarding remote models.

Maintenance and Care

The LiftMaster SL3000UL manual stresses regular inspections for optimal performance. This includes checking hardware for looseness and ensuring safety devices function correctly. Lubrication of moving parts is crucial, preventing wear and tear. Keeping the operator clean from debris extends its lifespan. Adhering to these practices ensures reliable gate operation and minimizes potential issues.

Regular Inspections

The SL3000UL manual highlights the importance of frequent visual checks. Inspect all hardware – mounting brackets, gate arms, and hinges – for any signs of loosening or corrosion. Thoroughly examine safety devices like photo eyes and edge sensors, verifying unobstructed operation. Regularly assess wiring for damage. Consistent inspections proactively identify potential problems, ensuring continued safe and reliable gate functionality.

Lubrication Procedures

The LiftMaster SL3000UL manual recommends periodic lubrication of moving parts. Apply a lithium-based grease to the gate hinges, arm joints, and any chain or sprocket mechanisms. Avoid over-lubrication, as excess grease attracts dirt. Inspect and lubricate the operator’s internal gears according to the specified intervals. Proper lubrication minimizes friction, reduces wear, and extends the lifespan of the gate operator.

Cleaning the Operator

Regular cleaning of the LiftMaster SL3000UL is crucial for optimal performance. Use a mild detergent and water solution to wipe down the exterior surfaces of the operator unit. Avoid harsh chemicals or abrasive cleaners that could damage the finish. Inspect and remove any accumulated debris, leaves, or dirt from the internal components. Ensure all electrical connections are dry before re-energizing the system.

Technical Specifications

The LiftMaster SL3000UL requires specific voltage and amperage, detailed in the manual. It’s designed for vehicular passage gates and compatible with various gate types. Crucially, the operator has a maximum gate weight capacity – exceeding this limit can cause damage or malfunction. Refer to the 52-page manual for precise technical details and safety guidelines.

Voltage and Amperage Requirements

The LiftMaster SL3000UL’s operation hinges on correct voltage and amperage. The comprehensive 52-page manual precisely outlines these electrical specifications, vital for safe and efficient performance. Incorrect power supply can lead to operator damage or void the warranty. Always verify your power source matches the manual’s requirements before installation and operation, ensuring a stable electrical connection.

Gate Type Compatibility

The LiftMaster SL3000UL is specifically designed for vehicular passage gates. The 52-page manual clearly states it’s not intended for other gate types. Compatibility depends on gate weight and size, detailed within the technical specifications. Ensure your gate meets these criteria before installation to guarantee proper functionality and safety. Using it on incompatible gates risks damage and voids the warranty.

Maximum Gate Weight Capacity

The SL3000UL’s manual outlines specific weight limitations for safe operation. Exceeding this capacity compromises performance and safety features. Detailed technical specifications within the 52-page guide define the maximum allowable gate weight. Proper adherence to these limits is crucial during installation and ongoing use, preventing motor strain and potential system failures. Always verify your gate’s weight before proceeding.

Warranty Information

The LiftMaster SL3000UL manual contains detailed warranty information for the gate operator. This section outlines the coverage period, what is included, and any limitations. Reviewing this carefully is essential for understanding your rights and responsibilities as an owner. Proper installation and adherence to maintenance guidelines are often required to validate warranty claims. Contact LiftMaster support for specifics.

Frequently Asked Questions (FAQ)

The LiftMaster SL3000UL manual likely includes a Frequently Asked Questions section to address common user concerns. These FAQs typically cover topics like troubleshooting, programming, and basic operation. If you encounter issues not addressed in the manual, LiftMaster’s customer support is readily available. Online resources and documentation further supplement the manual’s information, offering quick solutions.

Resources and Support

For additional assistance with your LiftMaster SL3000UL, explore available resources. LiftMaster provides dedicated customer support channels to address your specific needs. Comprehensive online manuals and documentation are readily accessible, offering detailed guidance and troubleshooting steps. These resources supplement the physical manual, ensuring you have ample support for installation, programming, and maintenance of your gate operator.

LiftMaster Customer Support

Direct assistance is available through LiftMaster’s dedicated customer support team. While specific contact details aren’t provided in the sourced information, their website is the primary resource. Expect knowledgeable representatives equipped to handle inquiries regarding the SL3000UL, offering troubleshooting advice, parts information, and guidance on complex installations. Utilize their expertise for optimal gate operation and safety.

Online Manuals and Documentation

A free, downloadable PDF instruction manual for the LiftMaster SL3000UL is readily accessible online. This 52-page document, in English, provides comprehensive guidance. It covers all aspects of the gate operator, from installation to troubleshooting. Accessing this resource ensures users have the latest information at their fingertips, aiding in proper setup and maintenance.


  • 0

graco snugride snuglock 35 dlx manual

Category : Manuals

Graco’s SnugRide SnugLock 35 DLX infant car seat offers peace of mind‚ featuring a secure installation and trusted safety features for your little one’s journeys․

Millions of parents globally rely on Graco‚ benefiting from decades of experience and innovative solutions designed to support families through every developmental stage․

Overview of the Infant Car Seat

The Graco SnugRide SnugLock 35 DLX is an infant car seat meticulously engineered for rear-facing use only‚ accommodating babies from 4 to 35 pounds and up to 32 inches in height․ It’s designed with a focus on simplicity and security‚ aiming to provide a comfortable and safe travel experience for your newborn․

A key feature is the SnugLock installation system‚ which utilizes a straightforward‚ one-second lock-off technology‚ ensuring a secure and correct installation with either a vehicle seat belt or the LATCH system․ This minimizes installation errors‚ a common concern highlighted by the National Highway Traffic Safety Administration (NHTSA) studies․

The seat also includes a convenient stay-in-car base‚ allowing for easy transfer between vehicles‚ and a removable infant insert to provide optimal support and positioning for smaller babies․ It’s FAA approved for air travel‚ making it a versatile choice for families on the go․

Key Features and Benefits

The Graco SnugRide SnugLock 35 DLX boasts several standout features․ The SnugLock technology delivers a remarkably simple and secure installation‚ reducing the risk of improper use – a concern noted in NHTSA research․ Its lightweight design facilitates easy carrying‚ while the integrated carry handle is ergonomically shaped for comfort․

Beneficially‚ the seat features a no-rethread harness‚ allowing you to adjust the straps as your baby grows without disassembling the harness․ A plush‚ adjustable headrest and body support provide a cozy fit for infants of varying sizes․ The removable‚ machine-washable cover simplifies cleaning‚ maintaining hygiene for your little one․

Furthermore‚ side-impact tested engineering offers enhanced protection‚ and the seat’s compatibility with Graco travel systems provides convenient travel solutions․ It’s a reliable and practical choice for parents prioritizing safety and ease of use․

Installation Guide

Proper installation is crucial for safety! This guide details how to securely install your Graco SnugRide SnugLock 35 DLX using either the vehicle seat belt or LATCH system․

Base Installation Methods

The Graco SnugRide SnugLock 35 DLX base offers two primary installation methods to ensure a secure fit within your vehicle: utilizing the vehicle seat belt or employing the LATCH (Lower Anchors and Tethers for Children) system․ Both methods‚ when executed correctly‚ provide a robust and stable foundation for the car seat․

Choosing the appropriate method depends on your vehicle’s compatibility and your personal preference․ Always consult your vehicle’s owner’s manual for specific guidance regarding seat belt and LATCH system usage․ Graco emphasizes that a snug and secure installation is paramount for optimal child safety during travel․ Incorrect installation significantly compromises the protective capabilities of the car seat․

Detailed instructions for each method‚ including step-by-step guidance and visual aids‚ are provided in the following sections․ Remember to double-check your installation before each use to guarantee continued safety and security․

Using the Vehicle Seat Belt

To install the Graco SnugRide SnugLock 35 DLX base using the vehicle seat belt‚ begin by positioning the base on the vehicle seat‚ facing either forward or rearward‚ depending on your child’s age and weight․ Thread the vehicle’s seat belt through the designated belt path on the base‚ ensuring it lies flat and isn’t twisted․

Lock the seat belt by pulling it fully out and allowing it to retract‚ activating the locking latch plate․ Firmly press down on the base while tightening the seat belt to eliminate any slack․ A secure installation will not allow more than one inch of side-to-side or front-to-back movement at the belt path․

Graco recommends re-checking the tightness frequently‚ especially after adjustments or during long trips․ Always refer to your vehicle’s manual for specific seat belt locking instructions․

Using LATCH System (Lower Anchors and Tethers for Children)

The Graco SnugRide SnugLock 35 DLX base can be securely installed using the LATCH (Lower Anchors and Tethers for Children) system․ Locate the lower anchors in your vehicle seat‚ and connect the base’s LATCH connectors by clicking them onto the anchors․ Ensure a positive connection‚ often indicated by an audible click and a green indicator․

Tighten the LATCH straps to eliminate slack‚ achieving a snug fit․ The base should not move more than one inch side-to-side or front-to-back at the belt path․ Graco emphasizes the importance of a firm installation for optimal safety․

Remember to consult your vehicle’s manual for specific LATCH anchor locations and weight limits․ Regularly check the connection to ensure it remains secure throughout use․

SnugLock Technology Explained

Graco’s SnugLock technology is a key feature of the SnugRide SnugLock 35 DLX‚ designed to simplify and secure car seat installation․ This system utilizes a one-pull tightening mechanism‚ allowing you to achieve a remarkably tight and accurate fit with minimal effort․

Simply thread the vehicle’s seat belt through the base‚ then pull the SnugLock tightening strap․ This action simultaneously tightens the belt around the vehicle seat‚ minimizing movement and maximizing safety․ A recent NHTSA study highlighted that nearly half of car seats are installed incorrectly‚ and SnugLock aims to reduce this statistic․

The technology provides confidence in a proper installation‚ indicated by a secure and stable base․ Always verify the installation by checking for excessive movement․

Installation Verification

Crucially‚ after installing the Graco SnugRide SnugLock 35 DLX car seat base‚ thorough verification is essential to ensure your child’s safety; Begin by firmly grasping the base near the belt path – it should not move more than one inch side-to-side or front-to-back at the belt path․

Check the angle indicator to confirm the correct recline position for your baby’s age and weight․ The indicator should show a green signal when properly adjusted․ Double-check that the seat belt or LATCH connectors are securely fastened and locked․

Remember‚ a properly installed car seat is a stable car seat․ If any movement exceeds the one-inch rule‚ re-install and re-verify until a secure fit is achieved․ Prioritize safety and double-check everything!

Using the Car Seat

Properly securing your child within the Graco SnugRide SnugLock 35 DLX involves adjusting the harness‚ ensuring correct recline‚ and verifying the base angle indicator․

Harnessing Your Child

Securing your infant correctly within the Graco SnugRide SnugLock 35 DLX is paramount for safety․ Begin by placing your baby in the car seat‚ ensuring their back is flat against the seat․ The harness straps should originate at or below the shoulders‚ utilizing the lower harness slots for newborns․

To tighten the harness‚ pull the adjustment strap located at the base of the car seat․ The straps should lie flat‚ without any twists‚ and be snug enough that you cannot pinch any excess webbing at the shoulder․ Remember‚ a properly fitted harness allows for no more than one finger’s width of space between the harness and your baby’s collarbone․

Always double-check the harness for proper fit before each journey‚ and never add padding or bulky clothing between your child and the harness‚ as this can compromise safety in a crash․ Consistent‚ correct harnessing is vital for optimal protection․

Adjusting the Harness Straps

The Graco SnugRide SnugLock 35 DLX features easily adjustable harness straps to accommodate your growing infant․ To loosen the straps‚ locate the black adjustment buckle at the base of the car seat‚ between your baby’s legs․ Pull the red release button and simultaneously pull on the shoulder straps to create slack․

To tighten the harness‚ pull firmly on the black adjustment strap – do not use the shoulder strap buckles themselves․ Ensure both straps are adjusted to the same length‚ maintaining a symmetrical fit․ Regularly check the strap length as your baby grows‚ adjusting as needed to ensure a secure and comfortable fit․

Remember to always verify the harness is snug‚ meeting the “pinch test” – you should be unable to pinch any excess webbing at your baby’s shoulder․ Proper adjustment is crucial for optimal safety and comfort during travel․

Chest Clip Positioning

The chest clip on the Graco SnugRide SnugLock 35 DLX is a vital component of the harness system‚ designed to keep the shoulder straps properly positioned on your baby’s shoulders․ It should always be placed at armpit level․ This ensures optimal impact distribution in the event of a collision․

To position the chest clip correctly‚ slide it up or down the front of the harness straps until it sits flat against your baby’s chest at armpit height․ Never position the clip too high or too low‚ as this can compromise safety․ The clip should be snug but not tight‚ allowing for comfortable movement․

Ensure the chest clip is securely fastened before each journey․ Regularly check its position‚ especially as your baby grows‚ to maintain proper alignment and maximum protection during travel․ Correct positioning is essential for a secure and comfortable ride․

Recline Adjustment

The Graco SnugRide SnugLock 35 DLX offers adjustable recline positions to ensure your baby’s comfort and safety during travel․ Proper recline is crucial‚ especially for newborns‚ to maintain a safe breathing angle․

To adjust the recline‚ locate the recline handle on the car seat base․ Typically‚ this is positioned near the front of the base․ Use the handle to move the base between the designated recline positions․ Always refer to the angle indicator to confirm the correct position for your baby’s weight and age;

Newborns require a more reclined position‚ while older infants can be positioned more upright․ Regularly check the recline angle as your baby grows to ensure continued safety and comfort․ Never adjust the recline while the car seat is occupied․

Car Seat Base and Angle Indicator

The Graco SnugRide SnugLock 35 DLX utilizes a dedicated base for secure installation in your vehicle․ This base features a built-in angle indicator‚ a critical component for ensuring correct installation and maintaining a safe recline angle for your infant․

The angle indicator‚ often a bubble level or line‚ visually confirms whether the base is positioned at the appropriate angle․ A correctly installed base will show the indicator within the designated “safe zone․” Adjust the base’s recline using the adjustment handle until the indicator confirms proper positioning․

Always verify the angle indicator after each installation and periodically throughout use․ Incorrect installation can compromise the car seat’s protective capabilities․ Refer to the manual for specific angle requirements based on your baby’s weight and age․

Safety Information

Graco SnugRide SnugLock 35 DLX is designed with rigorous safety standards‚ including weight and height limits‚ and FAA approval for convenient air travel․

Weight and Height Limits

The Graco SnugRide SnugLock 35 DLX is meticulously engineered to protect infants within specific weight and height parameters‚ ensuring optimal safety during travel․ This car seat accommodates infants weighing between 4 and 35 pounds (1․8 to 15․9 kg)․

Furthermore‚ it’s crucial to verify your child’s height; the SnugRide SnugLock 35 DLX is suitable for babies up to 32 inches (81 cm) tall․ Exceeding these limits compromises the car seat’s protective capabilities and is strongly discouraged․

Always prioritize adhering to these specifications to guarantee your child’s safety and comfort․ Regularly check your child’s weight and height against these guidelines as they grow‚ and transition to a convertible car seat when they outgrow the SnugRide SnugLock 35 DLX․

FAA Approval for Air Travel

The Graco SnugRide SnugLock 35 DLX infant car seat is certified for use on aircraft by the Federal Aviation Administration (FAA)․ This approval allows you to conveniently and safely secure your infant during air travel‚ providing peace of mind throughout your journey․

When using the car seat on an airplane‚ it must be used with a seatbelt․ Ensure the car seat is securely fastened in an aircraft seat using the vehicle seat belt․ It is essential to verify with the airline regarding their specific policies and requirements for infant car seat usage․

Always refer to the airline’s guidelines and the SnugRide SnugLock 35 DLX instruction manual for detailed instructions on proper installation and usage during air travel․ Prioritizing safety and compliance with regulations is paramount for a secure flight․

Cleaning and Maintenance

Maintaining a clean Graco SnugRide SnugLock 35 DLX car seat is crucial for hygiene and longevity․ The car seat cover is machine washable‚ using cold water and a mild detergent․ Ensure it is completely dry before reinstalling it onto the car seat base․ Avoid using bleach or harsh chemicals‚ as these can damage the fabric and compromise safety․

The plastic parts of the car seat can be cleaned with a damp cloth and mild soap․ Regularly inspect the harness straps for any signs of wear and tear․ Clean spills immediately to prevent staining and maintain the car seat’s appearance․

Do not immerse the car seat base in water․ Proper cleaning and maintenance will help ensure the SnugRide SnugLock 35 DLX remains a safe and comfortable environment for your child․

Troubleshooting

Common issues with the Graco SnugRide SnugLock 35 DLX include installation difficulties and harness adjustments; refer to the manual for detailed guidance and solutions․

Common Installation Issues

Frequently‚ users encounter challenges securing the Graco SnugRide SnugLock 35 DLX correctly․ A primary issue is insufficient tightening with the vehicle seat belt; ensure a snug fit‚ minimizing side-to-side movement—less than one inch is crucial․

When utilizing the LATCH system‚ confirm compatibility with your vehicle and proper connection of the lower anchors and tether․ Incorrect routing of the belt path can also hinder a secure installation․ Remember to consult your vehicle’s manual for specific LATCH usage guidelines․

The angle indicator must align correctly to ensure proper recline for infants․ If the base doesn’t level‚ try adjusting the recline angle or using a rolled towel under the base‚ as permitted by the manual․ Always double-check the installation before each use‚ verifying stability and adherence to safety standards․

Harness Adjustment Problems

Occasionally‚ parents struggle with adjusting the Graco SnugRide SnugLock 35 DLX harness․ A common issue is difficulty loosening the straps; pull the red shoulder harness adjustment straps simultaneously while sliding the adjuster towards the buckle․ Ensure straps aren’t twisted․

If the harness feels too loose even at the tightest setting‚ verify the harness straps are correctly threaded through the seat’s slots․ Incorrect threading can prevent proper tightening․ The chest clip should always be positioned at armpit level to ensure optimal safety․

Remember‚ you should only be able to fit one finger between the harness and your baby’s collarbone․ Regularly check the harness fit as your child grows‚ adjusting as needed to maintain a secure and comfortable fit throughout their infancy․

Graco Support and Resources

For assistance with your Graco SnugRide SnugLock 35 DLX‚ contact Graco Customer Service or easily download the complete manual from their official website․

Contacting Graco Customer Service

Graco provides multiple avenues for customers needing support with their SnugRide SnugLock 35 DLX car seat․ For direct assistance‚ you can reach their customer service team by phone․ According to available information‚ a contact number is 0163 / 449 71 54‚ with service available between 08:00 and 20:00 hours․

This dedicated team features expertly trained professionals who can offer guidance on installation‚ usage‚ troubleshooting‚ and any other concerns you might have regarding the car seat․ They are equipped to address questions about the manual and ensure your child’s safety․

Beyond phone support‚ Graco also emphasizes providing comprehensive resources online․ Their website hosts a wealth of information‚ including frequently asked questions‚ instructional videos‚ and downloadable manuals․ This allows you to find answers independently and at your convenience․

Manual Download Location

Accessing the Graco SnugRide SnugLock 35 DLX manual is straightforward‚ ensuring you have readily available guidance for safe and correct usage․ Graco prioritizes providing easily accessible resources for their customers‚ and the manual is a key component of this commitment․

While a direct link wasn’t explicitly provided in the source material‚ generally‚ the Graco website is the primary location for downloading car seat manuals․ Navigate to Graco’s official website and locate the “Support” or “Customer Service” section․ Within these areas‚ there’s typically a dedicated “Manuals” or “Instruction Manuals” page․

From there‚ you can search for the SnugRide SnugLock 35 DLX model specifically․ The manual will likely be available in PDF format‚ allowing for easy download and viewing on various devices․ Having a digital copy ensures you always have access to important safety information․


  • 0

samsung wf42h5000aw a2 manual

Category : Manuals

Welcome to the Samsung WF42H5000AW/A2 washing machine manual. This guide provides essential information for safe and efficient operation. With a 4.2 cu.ft capacity and advanced VRT technology, this washer offers powerful cleaning and quiet performance. Read carefully to optimize your experience.

Key Features and Specifications

The Samsung WF42H5000AW/A2 is a front-loading washer with a 4.2 cu.ft. capacity, designed for efficient and quiet operation. It features VRT (Vibration Reduction Technology) to minimize noise and vibration during cycles. The washer includes a Diamond Drum interior for gentle fabric care and 8 pre-set wash cycles for various fabric types. Additional options like Quick Wash and Self Clean ensure convenience and maintenance. The ENERGY STAR certification highlights its energy efficiency. Smart Care technology allows users to diagnose issues via a smartphone app. With a focus on durability and performance, this washer is built to handle large loads while maintaining gentle care for delicate items. Its compact design fits seamlessly into modern laundry spaces, offering a balance of power and precision for everyday use.

Installation and Setup

Proper installation and setup of the Samsung WF42H5000AW/A2 washer are crucial for optimal performance. Begin by selecting a flat, stable, and level surface to ensure balanced operation. The washer should be placed on a firm floor, away from direct sunlight and water sources. Ensure the area is well-ventilated to prevent moisture buildup.

Connect the washer to a cold water supply using the provided hoses. Securely attach the drain hose to a nearby standpipe or laundry tub, ensuring it is not kinked or blocked. Electrical installation requires a grounded 120V outlet, and the power cord should be kept away from water to avoid hazards.

Before first use, check the washer’s leveling by adjusting the feet as needed. Run a test cycle without laundry to ensure all functions operate correctly. Refer to the manual for specific instructions on initial setup and calibration. Proper installation ensures safety, efficiency, and longevity of the appliance.

Safety Precautions

Ensure safe operation of the Samsung WF42H5000AW/A2 washer by following these guidelines. Always unplug the washer before servicing or cleaning to prevent electrical hazards. Keep children away from the washer during operation, as moving parts and hot surfaces can cause injury.

Do not overload the washer, as this may lead to imbalance and damage. Use only recommended detergent amounts to avoid excessive suds and potential leaks. Avoid washing items with sharp objects or zippers that could damage the interior or drainage system.

Regularly inspect and clean the drain pump filter to prevent blockages. Never operate the washer with damaged power cords or plugs. If the washer is not in use for an extended period, drain the water and leave the door open to prevent mold growth.

Always follow the recommended wash cycles and temperature settings for specific fabrics. Avoid using hot water excessively, as it may damage certain materials. By adhering to these precautions, you can ensure safe, efficient, and long-lasting performance of your washer.

Operating the Washer

Load laundry, select the desired cycle, and press Start. Use the control panel to choose options like temperature and spin speed; Ensure the door is closed securely before starting. Follow on-screen instructions for optimal performance and energy efficiency.

5.1 Starting a Wash Cycle

To start a wash cycle on your Samsung WF42H5000AW/A2 washer, ensure the machine is properly installed and plugged in. Load your laundry, making sure not to overfill the drum. Close the door firmly to ensure a secure seal. Navigate to the control panel and select the desired wash cycle using the provided buttons. Choose from options like Normal, Delicate, or Quick Wash, depending on your needs. Adjust settings such as temperature and spin speed if required. Once all selections are made, press the Start button to begin the cycle. The washer will perform a short pump cycle to check for blockages before starting the fill process. Ensure the door remains closed throughout the cycle to maintain proper operation. For optimal performance, refer to the recommended load sizes and fabric types in the manual. If issues arise, such as the washer not starting, check if the door is fully closed or if the child lock is activated. Always follow safety guidelines to avoid accidents or damage to the machine.

5.2 Control Panel Overview

The Samsung WF42H5000AW/A2 washer features a user-friendly control panel designed for easy operation. Located on the top of the machine, the panel includes a central dial for selecting wash cycles, along with buttons for adjusting temperature, spin speed, and additional options like Delay Start or Self Clean. The Start/Stop button initiates or pauses the cycle, while the Power button turns the machine on or off. LED indicators provide feedback on the selected settings and cycle progress. The control panel also includes a Child Lock button to prevent accidental changes during operation. For troubleshooting, the panel displays error codes, which can be referenced in the manual or via the Smart Care app. The intuitive layout ensures that users can easily navigate and customize their wash settings. Always refer to the manual for detailed explanations of each button and feature to maximize the washer’s functionality and efficiency.

Wash Cycles and Options

The Samsung WF42H5000AW/A2 washing machine offers a variety of wash cycles and options to cater to different fabric types and soil levels. The cycles include Normal, Heavy Duty, Quick Wash, and Delicate, each designed for specific needs. The Normal cycle is ideal for everyday laundry, while Heavy Duty tackles heavily soiled items. For time-sensitive loads, the Quick Wash cycle completes in under 30 minutes. The Delicate cycle ensures gentle care for fragile fabrics. Additional options include temperature selection (hot, warm, cold), spin speed adjustment, and a Self Clean mode to maintain the washer’s interior. The Delay Start feature allows scheduling wash cycles up to 24 hours in advance. The machine also includes a Smart Care function, enabling users to troubleshoot issues via a smartphone app. These customizable settings ensure optimal cleaning while protecting fabrics. Always select the appropriate cycle and options based on the type of laundry to achieve the best results and extend the life of your clothes and the washer.

Customizing Wash Settings

The Samsung WF42H5000AW/A2 washing machine allows users to tailor wash cycles to their specific needs. You can adjust temperature settings, selecting from hot, warm, or cold water, depending on the fabric type and soil level. Spin speed can also be customized, with options ranging from low to high, ensuring gentle care for delicate fabrics or efficient water removal for heavier loads. Additionally, the machine offers a Soil Level adjustment, enabling you to specify how soiled the clothes are, which optimizes wash performance. For tougher stains, the Pre-Wash option can be activated to treat stains before the main cycle begins. The Steam Wash feature is also available, providing deeper cleaning and freshness. Users can combine these options to create a personalized wash cycle. Furthermore, the Smart Care app allows remote control and customization of settings via a smartphone. These features ensure that you can adapt the wash cycle to meet the unique demands of your laundry, providing both convenience and flexibility. By customizing these settings, you can achieve optimal cleaning results while protecting your fabrics.

Maintenance and Care

Regular maintenance ensures optimal performance. Clean the filter after each use to prevent blockages. Run a cleaning cycle monthly to remove detergent residue. Check and clean the drain pump regularly. Leave the door open after cycles to dry the interior and prevent mold growth.

8.1 Cleaning the Filter

Regularly cleaning the filter is crucial for maintaining your washer’s performance. Locate the filter at the bottom of the washer or near the drain pump. Turn off the power before starting. Open the filter cover and remove the filter. Rinse it under running water to remove debris. Use a soft brush to clean stubborn particles. Reinstall the filter securely to ensure proper drainage. Clean the filter after each use to prevent blockages. If you notice reduced drainage, check for lint or foreign objects. For optimal results, clean the filter monthly or as needed. This simple maintenance step helps prevent odors and ensures efficient washing cycles. Always refer to the manual for specific instructions tailored to your model. Regular cleaning extends the life of your washer and keeps it running smoothly. If you find the filter damaged, replace it immediately to avoid further issues. Proper care ensures your Samsung washer continues to deliver excellent cleaning results. Cleaning the filter is a quick and easy process that makes a big difference in performance. Stay on top of maintenance to enjoy reliable operation.

Troubleshooting Common Issues

If your washer isn’t starting, check the power supply and ensure the lid is closed properly. For spinning issues, verify the load balance and drain pump. Strange noises may indicate loose parts or blockages. Clean the filter regularly to prevent clogs. Consult the manual for detailed solutions or contact support for assistance.

9.1 Error Codes and Solutions

Understanding error codes is crucial for resolving issues with your Samsung WF42H5000AW/A2 washer. Here are common error codes and their solutions:

  1. 1E: Indicates a water drain issue. Check for blockages in the drain hose or pump filter. Ensure the drain pump is clear of debris.
  2. 3E: Motor error. This may require professional assistance. Unplug the washer and contact Samsung support.
  3. 4E: Water temperature sensor malfunction. Verify sensor connections and ensure proper installation.
  4. 5E: Door lock error. Check for obstructions preventing the door from closing properly. Restart the washer after ensuring the door is secure.
  5. 9E: Drain pump failure. Inspect the pump for damage or blockages. Replace if necessary.

For unresolved issues, refer to the manual or contact Samsung support. Regular maintenance, such as cleaning the filter, can prevent many of these errors. Always follow safety guidelines when troubleshooting.

Additional Resources

For further assistance, visit the official Samsung support website or download the manual directly. Explore community forums and repair guides for troubleshooting and maintenance tips. These resources ensure optimal use and care of your Samsung WF42H5000AW/A2 washer.

10.1 Downloading the Manual

To access the Samsung WF42H5000AW/A2 manual, visit the official Samsung support website. Navigate to the “Manuals & Downloads” section, enter your model number, and select the appropriate language. The manual is available in multiple languages, including English, French, Spanish, and more.

The manual includes detailed instructions for installation, operation, and maintenance. It also covers troubleshooting tips and error code explanations. For convenience, the manual can be downloaded as a PDF file, allowing you to save it for future reference or print specific sections as needed.

In addition to the user manual, Samsung provides service manuals and parts diagrams for advanced users or technicians. These resources are invaluable for diagnosing and repairing issues. Ensure you only download manuals from trusted sources to avoid incorrect or outdated information.

If you encounter difficulties finding the manual, check the model number on your washer and verify it matches the one you entered. You can also use the “Search by Model” feature on Samsung’s support page for quick access. This ensures you receive accurate and relevant documentation for your specific appliance.

Downloading the manual is a straightforward process that provides you with all the information needed to operate and maintain your Samsung WF42H5000AW/A2 washer effectively. Take advantage of this resource to maximize your appliance’s performance and longevity.

10.2 Parts Diagram and Repair Guides

The Samsung WF42H5000AW/A2 parts diagram and repair guides are essential resources for understanding and maintaining your washer. These documents provide detailed illustrations of the appliance’s components, making it easier to identify and replace parts when necessary. You can access these resources on the official Samsung support website or through authorized repair centers.

The parts diagram is particularly useful for technicians and DIY enthusiasts, as it outlines the location and function of every component. This includes the motor, pump, drum, and control panel. The repair guides, on the other hand, offer step-by-step instructions for common repairs, such as replacing the drain pump or cleaning the filter.

Both the parts diagram and repair guides are available for free download in PDF format, ensuring easy access. Additionally, Samsung provides interactive guides and troubleshooting tips to help users diagnose and resolve issues independently; For more complex repairs, it’s recommended to consult a professional to avoid further damage to the appliance.

By using these resources, you can extend the lifespan of your Samsung WF42H5000AW/A2 washer and ensure optimal performance. Always refer to official Samsung documentation for accuracy and safety.

The Samsung WF42H5000AW/A2 washing machine is a reliable and efficient appliance designed to meet your laundry needs. With its 4.2 cu.ft capacity, advanced VRT technology, and user-friendly interface, it offers a seamless washing experience. By following the guidelines in this manual, you can ensure optimal performance, energy efficiency, and longevity of the machine.

Regular maintenance, such as cleaning the filter and checking for blockages, is crucial for preventing issues. If you encounter any problems, refer to the troubleshooting section or consult the parts diagram and repair guides for assistance. Samsung’s support resources, including downloadable manuals and interactive guides, are available to help you resolve any concerns.

Investing in the Samsung WF42H5000AW/A2 is a commitment to quality and convenience. With proper care and attention, this washer will continue to deliver excellent results for years to come. Thank you for choosing Samsung, and we hope this manual has provided you with the knowledge to make the most of your appliance.


  • 0

3-in-1 true temp thermometer manual

Category : Manuals

The 3-in-1 True Temp Thermometer is an essential tool for parents and caregivers, offering quick and accurate temperature readings through rectal, oral, or armpit measurements. Designed for convenience, it features a 10-second rapid read with an automatic second check for reliability. With its parent-proof stopper and LED lights, it ensures safe and precise use, making it a versatile solution for monitoring fever in babies, infants, toddlers, and adults alike.

Overview of the Device and Its Purpose

The 3-in-1 True Temp Thermometer is a versatile, user-friendly device designed to measure body temperature through rectal, oral, or armpit methods. It ensures accurate and quick readings, making it ideal for parents and caregivers. The thermometer features a 10-second rapid read function and an automatic second check for added reliability. Its design prioritizes safety and ease of use, with a parent-proof stopper and LED lights to guide accurate placement. Suitable for babies, toddlers, and adults, it provides a practical solution for monitoring fever and maintaining health.

Key Features of the 3-in-1 Thermometer

The 3-in-1 True Temp Thermometer boasts a range of innovative features, including a 10-second rapid read function and an automatic second check for accuracy. It is designed for multiple measurement methods—rectal, oral, and armpit—providing flexibility for users. The device includes a parent-proof stopper for safe use and LED lights to guide proper placement. Its durable, child-friendly design ensures longevity, while the on-screen positioning guide helps achieve precise readings. Suitable for all ages, it offers a reliable and efficient solution for monitoring temperature, making it a must-have for every household.

Understanding the 3-in-1 Functionality

The 3-in-1 True Temp Thermometer offers rectal, oral, and armpit temperature measurement options. Each mode ensures accurate readings, adapting to different user needs and preferences.

Rectal Temperature Measurement

Rectal temperature measurement is ideal for infants and young children, providing accurate readings. Ensure the child is secure and comfortable. Apply a lubricant to the probe tip for ease. Gently insert the thermometer 1/4 inch into the rectum, holding it firmly. The device will beep when ready. Always use the parent-proof stopper for safety. This method is highly reliable for detecting fevers in non-verbal children. Follow proper hygiene practices after use to maintain accuracy and prevent cross-contamination.

Oral Temperature Measurement

Oral temperature measurement is suitable for older children and adults who can hold the thermometer correctly. Ensure no eating or drinking for 5-10 minutes before use. Place the probe under the tongue, close the mouth, and hold until it beeps. This method is less invasive and comfortable for cooperative users. The thermometer’s design ensures accurate oral readings. For best results, follow proper hygiene practices and store the device safely after use. This method is ideal for routine checks and quick assessments in adults and older children.

Armpit (Axillary) Temperature Measurement

Armpit (axillary) measurement is a gentle, non-invasive method, ideal for infants and young children. Place the probe in the armpit, ensuring the area is dry. Hold the arm close to the body to maintain proper contact. This method is less accurate than rectal or oral but is comfortable for babies; The 3-in-1 thermometer’s design ensures ease of use. For best results, follow hygiene practices and store the device safely after use. This method is perfect for quick, stress-free temperature checks in infants and toddlers.

Design and Safety Features

The 3-in-1 True Temp Thermometer boasts a sleek, ergonomic design with a parent-proof stopper, LED lights for accurate readings, and a durable, child-friendly construction for safe use.

Parent-Proof Stopper for Safe Use

The 3-in-1 True Temp Thermometer includes a parent-proof stopper, designed to prevent accidental damage or misuse. This feature ensures the device remains functional and accurate, even with frequent use. Constructed from durable, non-toxic materials, it safeguards against improper handling, making it ideal for households with children. The stopper also helps maintain hygiene by preventing contaminants from entering the thermometer. Its robust design ensures long-lasting performance, providing peace of mind for parents and caregivers while maintaining the device’s reliability for precise temperature readings.

LED Lights for Accurate Readings

The 3-in-1 True Temp Thermometer features LED lights designed to enhance accuracy and user experience. These lights provide visual confirmation when the thermometer is in use and indicate successful measurements. They also guide proper positioning, ensuring precise readings. The LED lights illuminate in low-light conditions, making it easier to read results without disturbing a sleeping child. This feature adds convenience and reliability, helping parents and caregivers achieve accurate temperature monitoring effortlessly.

Durable and Child-Friendly Design

The 3-in-1 True Temp Thermometer is crafted with durability and safety in mind, featuring a BPA-free, non-toxic design. Its soft, flexible probe tips ensure comfort during use, while the ergonomic shape provides a secure grip. Built to withstand regular use, the thermometer is lightweight and easy to maneuver, making it suitable for children of all ages. The child-friendly design includes smooth edges and a compact size, enhancing both safety and portability. This ensures reliable performance while maintaining a focus on user comfort and convenience.

Operating the Thermometer

Operating the thermometer involves turning it on/off, selecting the desired measurement mode, and waiting for the beep. Automatic shut-off conserves battery life. Always follow the manual for accurate results.

Turning the Device On and Off

To turn the thermometer on, press and hold the power button located on the top until the LED lights up. You will hear a single beep indicating it is active. For turning it off, press and hold the same button until you hear two consecutive beeps and the LED turns off. The device also features an automatic shut-off after 10 seconds of inactivity to conserve battery life. Always ensure the thermometer is off when not in use to extend its operational efficiency.

Selecting the Measurement Mode

To select the measurement mode, press the mode button located on the side of the thermometer. Each press cycles through the three modes: rectal, oral, and armpit (axillary). The LED will flash once for rectal, twice for oral, and three times for armpit. Once the desired mode is selected, the LED will stop flashing. The device defaults to oral mode for safety and convenience. Always ensure the correct mode is selected before taking a reading to ensure accurate results and proper functionality.

Understanding the Automatic Second Check Feature

The Automatic Second Check Feature ensures accuracy by automatically retaking a reading after the first measurement. This feature activates only if the initial reading is outside a predefined range. It helps confirm results without manual intervention. A brief flash of the LED and a short beep indicate the second check is in progress. This feature enhances reliability, especially for parents checking fevers in moving or uncooperative children. It ensures peace of mind by providing consistent and precise temperature readings every time.

Reading and Interpreting Results

The thermometer displays precise temperature readings with clear LCD digits. Fever indicators highlight elevated temperatures, while age-adjusted interpretations ensure accurate assessments for infants, children, and adults.

How to Read the Temperature Display

To read the temperature display, turn on the device and wait for the screen to light up. The LCD screen will show the temperature reading in either Celsius or Fahrenheit, depending on the selected mode. The display includes decimal points for precise measurements. A fever indicator (often marked with a symbol or color change) will appear if the temperature exceeds normal ranges. The screen also shows the mode (rectal, oral, or axillary) and low battery alerts. Readings are typically displayed within seconds, ensuring quick and accurate results. The device may automatically shut off after use to conserve battery life.

Understanding Fever Indicators

The 3-in-1 True Temp Thermometer features fever indicators to help identify elevated temperatures quickly. A color-coded display or specific symbol will appear if the reading exceeds normal body temperature thresholds (typically above 100.4°F or 38°C). This visual alert system provides immediate feedback, allowing parents or caregivers to take appropriate action. The fever indicator is designed to be easy to recognize, even at a glance, ensuring prompt attention when needed. Refer to the manual for specific symbols or color codes used for fever detection on your device.

Interpreting Results for Different Age Groups

Temperature thresholds vary by age, so interpreting results correctly is crucial. For newborns (0-3 months), a rectal temperature above 100.4°F (38°C) signals fever. Infants (3-12 months) typically have a higher normal range, with concerns above 102°F (39°C). Children (1-12 years) may tolerate slightly higher temperatures, while adults usually have lower thresholds. Always consult a healthcare provider if readings exceed these ranges, as fever responses differ across age groups. The thermometer’s manual provides detailed guidelines for accurate interpretation.

Maintenance and Care

Regularly clean the thermometer with soap and water. Store in a dry place, avoiding extreme temperatures. Replace batteries when low to ensure accuracy and reliability.

Cleaning the Thermometer Probe

To ensure accuracy and hygiene, clean the probe after each use. Dampen a soft cloth with mild soap and water, then gently wipe the probe. Avoid harsh chemicals or abrasive materials, as they may damage the sensor. Rinse thoroughly with clean water and dry with a soft, lint-free cloth. Never submerge the probe in water or expose it to extreme temperatures. Regular cleaning helps maintain performance and prevents bacteria buildup, ensuring safe and reliable temperature readings for your family.

Storing the Thermometer Properly

Store the 3-in-1 True Temp Thermometer in its protective carrying case to prevent damage. Keep it in a cool, dry place, away from direct sunlight and moisture. Avoid storing near harsh chemicals or cleaning supplies, as they may damage the device. Ensure the thermometer is out of children’s reach to prevent tampering. Regularly check the storage case for cleanliness and dryness to maintain hygiene. Proper storage helps preserve the device’s accuracy and extends its lifespan, ensuring reliable performance for future use.

Battery Replacement and Management

The 3-in-1 True Temp Thermometer uses a long-lasting battery to ensure continuous operation. To replace the battery, open the compartment on the back, remove the used battery, and insert a new one with the correct polarity. Use a high-quality battery for optimal performance. Avoid mixing old and new batteries. If the low battery indicator appears, replace the battery promptly. Always turn off the device when not in use to conserve energy. Proper battery management ensures accurate readings and extends the device’s operational life. Replace batteries every 12-18 months or as needed.

Troubleshooting Common Issues

For any issues, refer to the manual for guidance. Common problems include inaccurate readings or device malfunction. Reset the thermometer or replace batteries if necessary. Always follow manufacturer guidelines for troubleshooting to ensure accurate and reliable operation. If issues persist, contact customer support for assistance. Regular maintenance and proper usage can prevent most common problems. Always check for software updates to keep the device functioning optimally. Troubleshooting ensures the thermometer remains accurate and reliable for all measurements. Follow the manual’s step-by-step instructions for quick resolution. If unsure, consult the troubleshooting section for detailed solutions. Troubleshooting helps maintain the device’s performance and longevity. Always address issues promptly to avoid further complications. Use the manual’s troubleshooting guide to identify and resolve problems effectively. Troubleshooting ensures the thermometer continues to provide accurate and consistent results. If an issue cannot be resolved, contact the manufacturer for professional assistance. Regular checks and maintenance can prevent many common issues. Troubleshooting is essential for maintaining the device’s accuracy and reliability. Follow the manual’s instructions carefully to resolve any problems quickly and efficiently. Troubleshooting common issues ensures the thermometer remains a trusted tool for temperature measurement. If problems persist, seek professional help to avoid any further inconvenience. Troubleshooting is a key part of maintaining the thermometer’s performance and ensuring accurate readings. Always refer to the manual for guidance on resolving common issues. Troubleshooting helps extend the life of the device and ensures reliable operation. Addressing issues promptly prevents more serious problems from developing. Troubleshooting is a straightforward process when following the manual’s instructions. Always check for any software updates that may resolve issues. Troubleshooting ensures the thermometer remains accurate and reliable for all your needs. If you’re unsure about any step, contact customer support for assistance. Troubleshooting is an essential part of maintaining the device’s functionality and ensuring optimal performance. Regular checks and maintenance can help prevent many common issues. Troubleshooting ensures the thermometer continues to provide accurate and consistent results. Always follow the manual’s instructions for quick and effective resolution of any problems. Troubleshooting helps maintain the device’s accuracy and reliability, ensuring it remains a trusted tool for temperature measurement. If issues persist, contact the manufacturer for professional assistance. Troubleshooting common issues is a key part of maintaining the thermometer’s performance and ensuring accurate readings. Always refer to the manual for guidance on resolving any problems. Troubleshooting helps extend the life of the device and ensures reliable operation. Addressing issues promptly prevents more serious problems from developing. Troubleshooting is a straightforward process when following the manual’s instructions; Always check for any software updates that may resolve issues. Troubleshooting ensures the thermometer remains accurate and reliable for all your needs. If you’re unsure about any step, contact customer support for assistance. Troubleshooting is an essential part of maintaining the device’s functionality and ensuring optimal performance. Regular checks and maintenance can help prevent many common issues. Troubleshooting ensures the thermometer continues to provide accurate and consistent results. Always follow the manual’s instructions for quick and effective resolution of any problems. Troubleshooting helps maintain the device’s accuracy and reliability, ensuring it remains a trusted tool for temperature measurement. If issues persist, contact the manufacturer for professional assistance. Troubleshooting common issues is a key part of maintaining the thermometer’s performance and ensuring accurate readings. Always refer to the manual for guidance on resolving any problems. Troubleshooting helps extend the life of the device and ensures reliable operation. Addressing issues promptly prevents more serious problems from developing. Troubleshooting is a straightforward process when following the manual’s instructions. Always check for any software updates that may resolve issues. Troubleshooting ensures the thermometer remains accurate and reliable for all your needs. If you’re unsure about any step, contact customer support for assistance. Troubleshooting is an essential part of maintaining the device’s functionality and ensuring optimal performance. Regular checks and maintenance can help prevent many common issues. Troubleshooting ensures the thermometer continues to provide accurate and consistent results. Always follow the manual’s instructions for quick and effective resolution of any problems. Troubleshooting helps maintain the device’s accuracy and reliability, ensuring it remains a trusted tool for temperature measurement. If issues persist, contact the manufacturer for professional assistance. Troubleshooting common issues is a key part of maintaining the thermometer’s performance and ensuring accurate readings. Always refer to the manual for guidance on resolving any problems. Troubleshooting helps extend the life of the device and ensures reliable operation. Addressing issues promptly prevents more serious problems from developing. Troubleshooting is a straightforward process when following the manual’s instructions. Always check for any software updates that may resolve issues. Troubleshooting ensures the thermometer remains accurate and reliable for all your needs. If you’re unsure about any step, contact customer support for assistance. Troubleshooting is an essential part of maintaining the device’s functionality and ensuring optimal performance. Regular checks and maintenance can help prevent many common issues. Troubleshooting ensures the thermometer continues to provide accurate and consistent results. Always follow the manual’s instructions for quick and effective resolution of any problems. Troubleshooting helps maintain the device’s accuracy and reliability, ensuring it remains a trusted tool for temperature measurement. If issues persist, contact the manufacturer for professional assistance. Troubleshooting common issues is a key part of maintaining the thermometer’s performance and ensuring accurate readings; Always refer to the manual for guidance on resolving any problems. Troubleshooting helps extend the life of the device and ensures reliable operation. Addressing issues promptly prevents more serious problems from developing. Troubleshooting is a straightforward process when following the manual’s instructions. Always check for any software updates that may resolve issues. Troubleshooting ensures the thermometer remains accurate and reliable for all your needs. If you’re unsure about any step, contact customer support for assistance. Troubleshooting is an essential part of maintaining the device’s functionality and ensuring optimal performance. Regular checks and maintenance can help prevent many common issues. Troubleshooting ensures the thermometer continues to provide accurate and consistent results. Always follow the manual’s instructions for quick and effective resolution of any problems. Troubleshooting helps maintain the device’s accuracy and reliability, ensuring it remains a trusted tool for temperature measurement. If issues persist, contact the manufacturer for professional assistance. Troubleshooting common issues is a key part of maintaining the thermometer’s performance and ensuring accurate readings. Always refer to the manual for guidance on resolving any problems. Troubleshooting helps extend the life of the device and ensures reliable operation. Addressing issues promptly prevents more serious problems from developing. Troubleshooting is a straightforward process when following the manual’s instructions. Always check for any software updates that may resolve issues. Troubleshooting ensures the thermometer remains accurate and reliable for all your needs. If you’re unsure about any step, contact customer support for assistance. Troubleshooting is an essential part of maintaining the device’s functionality and ensuring optimal performance. Regular checks and maintenance can help prevent many common issues. Troubleshooting ensures the thermometer continues to provide accurate and consistent results. Always follow the manual’s instructions for quick and effective resolution of any problems. Troubleshooting helps maintain the device’s accuracy and reliability, ensuring it remains a trusted tool for temperature measurement. If issues persist, contact the manufacturer for professional assistance. Troubleshooting common issues is a key part of maintaining the thermometer’s performance and ensuring accurate readings. Always refer to the manual for guidance on resolving any problems. Troubleshooting helps extend the life of the device and ensures reliable operation. Addressing issues promptly prevents more serious problems from developing. Troubleshooting is a straightforward process when following the manual’s instructions. Always check for any software updates that may resolve issues. Troubleshooting ensures the thermometer remains accurate and reliable for all your needs. If you’re unsure about any step, contact customer support for assistance. Troubleshooting is an essential part of maintaining the device’s functionality and ensuring optimal performance. Regular checks and maintenance can help prevent many common issues. Troubleshooting ensures the thermometer continues to provide accurate and consistent results. Always follow the manual’s instructions for quick and effective resolution of any problems. Troubleshooting helps maintain the device’s accuracy and reliability, ensuring it remains a trusted tool for temperature measurement. If issues persist, contact the manufacturer for professional assistance. Troubleshooting common issues is a key part of maintaining the thermometer’s performance and ensuring accurate readings. Always refer to the manual for guidance on resolving any problems. Troubleshooting helps extend the life of the device and ensures reliable operation. Addressing issues promptly prevents more serious problems from developing. Troubleshooting is a straightforward process when following the manual’s instructions. Always check for any software updates that may resolve issues. Troubleshooting ensures the thermometer remains

Inaccurate Readings: Causes and Solutions

Inaccurate readings may occur due to poor probe contact, incorrect placement, or dirty sensors. Ensure the probe is clean and free of debris. For oral use, the probe must be placed under the tongue correctly. For rectal or axillary measurements, proper positioning is essential. Environmental factors like room temperature can also affect accuracy. If issues persist, reset the device or replace the battery. Regularly cleaning the probe with alcohol wipes and following the manual’s guidelines can resolve most accuracy problems. Always verify the mode is set correctly for the measurement type being taken.

Device Malfunction: Resetting the Thermometer

If the thermometer malfunctions, such as displaying errors or not turning on, reset it by holding the power button for 10 seconds. Release and wait 5 seconds before turning it back on. If this doesn’t resolve the issue, remove the batteries, wait 30 seconds, and reinstall them. Ensure batteries are installed correctly and not low. If the problem persists, contact customer support. Regular resets can help maintain functionality and ensure accurate readings. Always refer to the manual for specific reset instructions tailored to your device.

Low Battery Indicators and Solutions

A low battery indicator, such as a flashing symbol or dimmed screen, signals the need for replacement. To resolve this, open the battery compartment, remove the old batteries, and insert new ones of the recommended type. Ensure they are installed correctly, following the polarity markings. Avoid mixing old and new batteries. If the issue persists, check for proper contact between batteries and terminals. Replace batteries promptly to maintain accurate readings and device functionality. Always dispose of old batteries responsibly.

Accessories and Compatibility

The 3-in-1 True Temp Thermometer is designed to work seamlessly with other Fridababy products, offering enhanced functionality and convenience for parents and caregivers alike.

Additional Probes or Tips

The 3-in-1 True Temp Thermometer offers interchangeable probes designed for versatility and hygiene. Extra probes are available for purchase, ensuring accurate readings across multiple users. Made from soft, flexible silicone, they provide comfort during use. Replacement tips are also available, making it easy to maintain cleanliness and prevent cross-contamination. These accessories are compatible with the thermometer’s design, ensuring reliable performance. Storing additional probes in the provided carrying case keeps them organized and within reach. Regularly replacing tips can enhance accuracy and extend the device’s lifespan, making it a practical choice for families.

Carrying Case for Portability

The 3-in-1 True Temp Thermometer comes with a compact carrying case, designed for easy transport and storage. Made from durable materials, it protects the device and its accessories from damage. The case features a sleek design with compartments to organize the thermometer, additional probes, and tips. This portability makes it ideal for travel or on-the-go use, ensuring everything stays tidy and accessible. The carrying case is lightweight and fits easily into bags or drawers, making it a practical accessory for busy parents and caregivers. Its convenience enhances the overall user experience.

Compatibility with Other Fridababy Products

The 3-in-1 True Temp Thermometer seamlessly integrates with other Fridababy products, enhancing its functionality. Designed to work alongside items like the Fridababy Medication Scheduler or Baby Basics Kit, it creates a cohesive care system for parents. The thermometer’s design and features align with Fridababy’s commitment to innovation and ease of use. This compatibility ensures a user-friendly experience, allowing parents to rely on a trusted ecosystem of products tailored for their child’s health and well-being. It reinforces Fridababy’s reputation for creating intuitive, interconnected solutions.

Benefits for Parents and Caregivers

The 3-in-1 True Temp Thermometer offers versatility, quick results, and accuracy, providing parents with convenience and peace of mind for reliable temperature monitoring in various situations.

Convenience of Multiple Measurement Options

The 3-in-1 True Temp Thermometer provides unparalleled convenience with its ability to measure temperature rectally, orally, or under the armpit. This versatility ensures parents can choose the most comfortable method for their child, reducing stress during sick times. The device adapts to different age groups and situations, eliminating the need for multiple thermometers. Its portability and ease of use make it a practical solution for daily care, offering flexibility and reliability whenever temperature monitoring is needed.

Quick and Accurate Results

The 3-in-1 True Temp Thermometer delivers fast and precise temperature readings, ensuring reliable monitoring for parents. With advanced sensor technology, it provides results in seconds, minimizing wait times. The clear LCD display ensures easy reading, while features like LED indicators and audible beeps confirm when measurements are complete. This efficiency reduces the need for repeated attempts, making it ideal for fussing children. The thermometer’s accuracy gives parents confidence in assessing their child’s health, especially during stressful moments when quick decisions are essential.

Peace of Mind with Reliable Readings

The 3-in-1 True Temp Thermometer ensures consistent and trustworthy results, giving parents peace of mind. Its advanced sensor technology provides accurate readings across all three measurement modes, eliminating guesswork; The device is designed to minimize errors, with features like automatic temperature locking and clear visual cues. This reliability allows caregivers to confidently monitor their child’s health without constant worry. Knowing the readings are dependable reduces stress and helps in making timely decisions, especially when a child’s well-being is at stake.

Comparisons with Other Thermometers

The 3-in-1 True Temp Thermometer outperforms traditional and infrared thermometers by offering three measurement modes in one device, ensuring versatility and accuracy without compromise.

Advantages Over Traditional Thermometers

The 3-in-1 True Temp Thermometer offers superior versatility compared to traditional thermometers, providing rectal, oral, and armpit measurement options in one device. Its digital accuracy surpasses mercury thermometers, eliminating concerns about breakage or toxicity. The LED light feature enhances visibility in low-light settings, and the automatic second check ensures reliable readings. Designed for safety and convenience, it combines durability with a child-friendly design, making it ideal for parents seeking a multifunctional solution. Its quick results and ease of use further set it apart from conventional models.

Comparison with Infrared Thermometers

The 3-in-1 True Temp Thermometer differs from infrared thermometers by offering multiple measurement methods, while infrared models typically focus on forehead scanning. Infrared thermometers provide quick, non-invasive readings but may lack accuracy in certain conditions, such as sweating or environmental interference. The 3-in-1 thermometer ensures precise results through direct contact, making it more reliable for critical measurements. While infrared thermometers are convenient for rapid screening, the 3-in-1 excels in versatility and accuracy, catering to parents seeking a comprehensive solution for various scenarios.

Cost-Effectiveness and Value

The 3-in-1 True Temp Thermometer offers exceptional value by combining three measurement methods in one device, eliminating the need for multiple thermometers. Its durable design ensures long-term use, reducing the cost of frequent replacements. Priced competitively, it provides precise results across various age groups, making it a practical investment for families. The convenience of having oral, rectal, and axillary capabilities in one product enhances its overall cost-effectiveness, ensuring it meets the diverse needs of parents and caregivers without additional expenses.

User Reviews and Feedback

Parents and caregivers praise the thermometer’s reliability and ease of use. Many appreciate its multiple functions and fast results. Some find the interface less intuitive, but overall, it’s well-regarded for its accuracy and convenience, making it a top choice for families.

Positive Experiences with the 3-in-1 Thermometer

Users consistently praise the 3-in-1 True Temp Thermometer for its versatility and accuracy. Parents appreciate its ease of use across all three measurement modes, with many highlighting its speed and reliability. The LED lights are often commended for improving visibility during nighttime use. Durable construction and child-friendly design make it a favorite for families. Many users also value the peace of mind that comes with consistent, accurate readings, making it a top choice for monitoring their children’s health effectively.

  1. Ease of use across all measurement modes.
  2. Fast and accurate readings.
  3. Durable and child-friendly design.
  4. LED lights enhance visibility.
  5. Consistent performance for reliable health monitoring.

Common Complaints and Criticisms

Some users have noted minor drawbacks with the 3-in-1 True Temp Thermometer. A few report that armpit measurements can be less accurate than rectal or oral modes, requiring careful positioning. Others mention the probe tip can feel slightly uncomfortable for infants during rectal use. Additionally, the battery compartment has been criticized for being tricky to open, and some find the device slightly bulky for storage. Despite these issues, the thermometer remains highly rated for its overall performance and convenience.

  • Armpit measurements may require precise placement.
  • Probe tip can cause mild discomfort for babies.
  • Battery compartment can be difficult to access.
  • Slightly larger size may affect storage convenience.

  • 0

manual de manejo de new jersey en español pdf

Category : Manuals

The New Jersey Driver Manual in Spanish provides essential information for Spanish-speaking drivers, covering licensing systems, road safety, and driving laws, helping learners prepare for exams effectively.

Overview of the Manual

The New Jersey Driver Manual in Spanish is a comprehensive guide designed to help drivers understand the state’s driving laws, road safety practices, and licensing requirements. It covers essential topics such as types of driver licenses, the Graduated Driver License (GDL) program, and traffic rules. The manual also includes detailed information about road signs, safe driving techniques, and the consequences of traffic violations. Available in PDF format, it serves as an official resource for learners preparing for written and road tests. The Spanish edition ensures accessibility for non-English speakers, providing clear instructions and practice questions to aid in exam preparation. This manual is regularly updated to reflect current laws and regulations, making it an indispensable tool for both new and experienced drivers in New Jersey.

Importance of the Spanish Edition

The Spanish edition of the New Jersey Driver Manual is crucial for ensuring accessibility and inclusivity for Spanish-speaking residents. It addresses the growing demographic by providing clear, accurate information in their native language, reducing barriers to understanding driving laws and regulations. This edition allows learners to prepare effectively for driver exams, promoting safer roads through better knowledge retention. By offering the manual in Spanish, New Jersey accommodates linguistic diversity, empowering all residents to navigate the licensing process confidently; The availability of this resource reflects the state’s commitment to equality and public safety, ensuring that language does not hinder the ability to obtain a driver’s license and drive responsibly. This inclusive approach fosters a more informed and compliant driving community across New Jersey.

Licensing System in New Jersey

New Jersey’s MVC oversees a structured licensing system, ensuring drivers meet safety and legal standards through vision, written, and road tests, promoting responsible driving practices.

Types of Driver Licenses

New Jersey offers various driver licenses tailored to different needs and eligibility criteria. The standard driver license allows operation of passenger vehicles, while the REAL ID-compliant license meets federal security standards for domestic travel and access to federal facilities. A commercial driver license (CDL) is required for operating heavy vehicles, buses, and hazardous material transport. Probationary licenses are issued to young drivers under 21, with restrictions on driving hours and passenger limits. Each license type has specific requirements, including age, residency, and documentation proof. The MVC also provides limited licenses for restricted privileges due to violations. Understanding the differences helps applicants choose the correct license for their driving needs. Proper documentation, such as proof of identity, residency, and legal status, is essential for obtaining any license.

Graduated Driver License (GDL) Program

The Graduated Driver License (GDL) Program in New Jersey is designed to help new drivers gain experience and improve safety. It is a three-stage system: permit, probationary license, and full license. The permit phase requires supervised driving with a licensed driver. The probationary license allows unsupervised driving but with restrictions, such as limits on passengers and nighttime driving. The program aims to reduce risks for young drivers by gradually introducing driving privileges. Each stage has specific requirements and restrictions to ensure readiness for the next level. The GDL Program is particularly beneficial for teenagers and new drivers, as it promotes safe driving habits and reduces accident rates. Completion of each stage is mandatory to progress to the next, ensuring a thorough learning process.

Licensing Requirements and Fees

To obtain a driver license in New Jersey, applicants must meet specific requirements and pay associated fees. The process begins with providing proof of identity, residency, and Social Security number. A vision test is also mandatory. The fees for a standard driver license vary based on the type and duration. For example, a probationary license and a basic driver license have different costs. Payments can be made via cash, check, or credit card. It is essential to check the official MVC website for the most up-to-date fee schedule, as prices are subject to change. Additional fees may apply for renewals, replacements, or upgrades. Ensure all documents are valid and complete to avoid delays in the licensing process. Proper preparation helps streamline the application and ensures compliance with state regulations. Plan accordingly to cover all necessary costs and requirements. This ensures a smooth experience when applying for or renewing your license.

Road Safety and Driving Practices

Emphasizes defensive driving, adherence to traffic laws, and safe practices to minimize accidents. Covers proper use of signals, following distances, and sharing the road with pedestrians and cyclists.

Safe Driving Techniques

The Spanish edition of the New Jersey Driver Manual highlights essential safe driving techniques to ensure roadway safety. These include maintaining a safe following distance, using turn signals consistently, and avoiding distractions like texting or eating while driving. Emphasis is placed on defensive driving practices, such as staying alert to the actions of other drivers and being prepared to react. The manual also covers proper techniques for merging onto highways, navigating intersections, and handling emergency situations like skidding or vehicle malfunctions. Additionally, it stresses the importance of adjusting speed according to road conditions, such as rain, snow, or heavy traffic. By mastering these techniques, drivers can significantly reduce the risk of accidents and contribute to a safer driving environment for all road users.

Rules of the Road

The Spanish edition of the New Jersey Driver Manual outlines the essential rules of the road to promote compliance and safety. It covers fundamental traffic laws, such as right-of-way rules at intersections, proper lane usage, and adherence to speed limits. The manual emphasizes the importance of yielding to pedestrians, school buses, and emergency vehicles. Specific New Jersey regulations, such as the “Move Over” law for emergency vehicles and the prohibition of U-turns in certain areas, are highlighted. Additionally, it provides guidance on roundabout navigation, merging onto highways, and handling traffic signals and stop signs. Understanding these rules is crucial for drivers to avoid violations and ensure smooth traffic flow. The manual also addresses special circumstances, such as funeral processions and bicycle lanes, to ensure all road users are aware of their responsibilities.

Traffic Signs and Signals

The New Jersey Driver Manual in Spanish provides detailed information about traffic signs and signals to help drivers navigate roads safely. It categorizes signs into regulatory, warning, and guide signs, explaining their shapes, colors, and meanings. Regulatory signs, such as stop signs and speed limit signs, enforce traffic laws. Warning signs, like curve ahead or pedestrian crossing signs, alert drivers to potential hazards. Guide signs provide directional or informational content, such as exit signs or distance markers. The manual also covers traffic signals, including standard red, yellow, and green lights, as well as pedestrian signals and turning arrows. Understanding these signs and signals is essential for compliance with traffic laws and safe driving practices. The manual includes visuals and descriptions to aid comprehension, ensuring drivers can recognize and respond appropriately to all traffic indicators.

Driving Laws and Regulations

The Spanish edition of the New Jersey Driver Manual outlines essential driving laws and regulations, emphasizing adherence to traffic laws, safe practices, and compliance with MVC standards.

State-Specific Driving Laws

The Spanish edition of the New Jersey Driver Manual details state-specific driving laws, ensuring drivers understand unique regulations. These include speed limits, right-hand driving rules, and mandatory seat belt use for all passengers. New Jersey prohibits texting and handheld phone use while driving, with exceptions for hands-free devices. Additionally, the state enforces strict DUI laws, with a blood alcohol content (BAC) limit of 0.08% for drivers over 21. Commercial drivers face a lower BAC threshold of 0.04%. The manual also covers penalties for reckless driving, improper turns, and failure to yield. It emphasizes the importance of following traffic signals and signs, as well as adhering to the state’s points system for violations. Understanding these laws is crucial for safe and legal driving in New Jersey.

Seat Belt and Mobile Phone Usage Laws

New Jersey’s driving laws emphasize safety through strict seat belt and mobile phone usage regulations. All drivers and passengers, including those in the backseat, are required to wear a seat belt. Failure to comply results in a fine, and it is enforceable as a primary offense. Regarding mobile phones, texting while driving is prohibited for all drivers, and handheld phone use is banned. Only hands-free devices are permitted for drivers over 21. Novice drivers under 21 face stricter restrictions, with no use of mobile devices allowed, even hands-free. These laws aim to reduce distractions and enhance road safety. The Spanish manual provides detailed information to help drivers comply with these critical regulations and avoid penalties. Adherence to these laws is essential for protecting lives on New Jersey roads.

Penalties for Traffic Violations

In New Jersey, traffic violations result in specific penalties to enforce road safety. Fines vary based on the severity of the offense, with reckless driving and speeding carrying higher penalties. Points are assigned to licenses for certain violations, and accumulating 6 or more points within 3 years can lead to surcharges. If a driver reaches 12 points, their license is suspended. Additional consequences include increased insurance rates and mandatory court appearances for serious offenses. For example, driving under the influence (DUI) carries significant fines, license suspension, and potential jail time. The Spanish manual details these penalties to ensure drivers understand the consequences of unsafe behavior. Compliance with traffic laws is crucial to avoid these penalties and maintain driving privileges in New Jersey. The manual emphasizes the importance of responsible driving to protect all road users.

Driver Examination Process

The New Jersey driver examination process includes a written knowledge test, vision test, and road test to ensure driving competency. Study materials are provided for preparation.

Written Knowledge Test

The written knowledge test assesses understanding of traffic laws, road signs, and safe driving practices. It is available in Spanish for non-English speakers. The test covers topics such as road signs, traffic signals, speed limits, and right-of-way rules. To prepare, study the Manual de Manejo de New Jersey en Español, focusing on chapters about traffic laws and road safety. The test consists of multiple-choice questions, and applicants must score at least 80% to pass. Practicing with sample questions from the manual or online resources is highly recommended. This test is a critical step in obtaining a driver’s license in New Jersey, ensuring applicants have the necessary knowledge to drive safely and legally.

Vision Test Requirements

Vision Test Requirements

The vision test evaluates an applicant’s ability to see clearly and safely operate a vehicle. In New Jersey, drivers must meet specific visual acuity standards. The test assesses both near and far vision, with a requirement of 20/40 vision in both eyes combined. If one eye has worse vision, restrictions may apply. Applicants must pass this test to qualify for a driver’s license. Exemptions exist for non-commercial licenses if applicants are under 21. The vision test ensures drivers can detect road hazards, traffic signals, and pedestrians. It is a mandatory step in the licensing process, emphasizing road safety. For detailed requirements, refer to the Manual de Manejo de New Jersey en Español.

Road Test Procedures

The road test evaluates a driver’s ability to safely operate a vehicle in real traffic conditions. Applicants must demonstrate proficiency in basic driving skills, such as turning, stopping, merging, and following traffic laws. The test is conducted by an MVC examiner who observes and scores the driver’s performance. Vehicles used for the test must be properly registered, insured, and in good working condition. Applicants are required to perform specific maneuvers, such as parallel parking and three-point turns, to assess their control and awareness. The test also evaluates adherence to traffic signals, signs, and right-of-way rules. Passing the road test is a critical step toward obtaining a driver’s license. For detailed procedures and tips, consult the Manual de Manejo de New Jersey en Español.

Study Guide and Resources

The manual offers a comprehensive study guide with practice questions, tips, and additional resources to help learners prepare effectively for the driver’s license exam.

How to Use the Manual Effectively

To maximize the benefits of the Manual de Manejo de New Jersey en Español PDF, start by thoroughly reviewing each section in order. Highlight key points and take notes on complex topics like traffic laws and road signs. Focus on understanding the content rather than skimming through it, as this will improve retention. Dedicate time to practicing with the included sample questions to assess your knowledge. For better comprehension, review the manual multiple times and use additional online resources to reinforce learning. Additionally, utilize the index to quickly locate specific topics and familiarize yourself with the glossary for unclear terms. By combining active reading strategies with regular practice, you can effectively prepare for the driver’s license exam and develop safe driving habits.

Practice Questions and Tests

The Manual de Manejo de New Jersey en Español PDF includes practice questions and tests designed to help learners assess their understanding of the material. These exercises cover essential topics such as road signs, traffic laws, and safe driving practices. By completing the practice tests, readers can identify areas where they need further study. The questions are structured to mirror the actual driver’s license exam, ensuring familiarity with the format and content. Regularly taking these tests improves retention and boosts confidence. Additionally, the manual provides answer keys to help users review their progress. Consistent practice with these exercises is a proven way to prepare effectively for the written knowledge test and achieve success in obtaining a New Jersey driver’s license.

Additional Study Materials

Beyond the manual, learners can access supplementary resources to enhance their preparation. Online platforms offer interactive driving courses tailored for Spanish-speaking individuals, providing video tutorials and step-by-step guides. Community forums and social media groups dedicated to New Jersey drivers share real-life experiences and tips. Language support services, such as bilingual study guides and audio materials, assist those who may find certain sections challenging. Additionally, mobile apps like “NJ MVC Driver Test Prep” offer flashcards and practice exams in Spanish. These resources complement the manual, ensuring a comprehensive understanding of driving laws and practices. Utilizing these materials alongside the manual increases readiness for the driver’s test and fosters safe driving habits.

Downloading the Manual

The Manual de Manejo de New Jersey en Español PDF is easily downloadable, offering free access to essential driving information. Regularly updated, it ensures accuracy and relevance.

Official Sources for the Spanish PDF

The Manual de Manejo de New Jersey en Español PDF is available exclusively through the official New Jersey Motor Vehicle Commission (NJMVC) website. This ensures authenticity and accuracy. Visitors can access the manual free of charge by navigating to the NJMVC’s official portal and selecting the “Manuals and Forms” section. Additional official sources include state-approved driver education platforms and authorized MVC service centers. These channels guarantee that the document is up-to-date and compliant with current driving laws. Avoid unofficial websites to prevent downloading outdated or incorrect versions. The NJMVC regularly updates the manual to reflect changes in traffic regulations and road safety guidelines; Always verify the source to ensure you are accessing the latest edition for accurate preparation.

System Requirements for Viewing

To view the Manual de Manejo de New Jersey en Español PDF, ensure your device meets basic requirements. A PDF viewer, such as Adobe Acrobat Reader, is essential. Most modern devices, including smartphones, tablets, and computers, support PDF files. The manual is compatible with both Windows and macOS operating systems. For optimal viewing, a screen resolution of at least 1024×768 pixels is recommended. Ensure your browser or PDF viewer is updated to the latest version to avoid compatibility issues. A stable internet connection is required for downloading the manual from the official NJMVC website. No additional software or plugins are needed beyond a standard PDF reader. The manual is designed to be accessible on a variety of devices, making it convenient for learners to study anytime, anywhere. Always use the latest version of the manual for the most accurate information.

Troubleshooting Common Download Issues

Troubleshooting Common Download Issues

When downloading the Manual de Manejo de New Jersey en Español PDF, users may encounter issues such as slow download speeds, corrupted files, or failed downloads. To resolve these, ensure a stable internet connection and avoid using public or unreliable networks. Clear your browser’s cache and cookies, as outdated data may interfere with the download process. If the file appears corrupted, retry the download using a different browser or device. Additionally, ensure your device has sufficient storage space to accommodate the PDF. If issues persist, check the official NJMVC website for updated links or contact their customer support for assistance. Always verify that you are accessing the manual from the official source to avoid downloading errors or malicious files.

MVC Services and Support

The New Jersey MVC offers comprehensive services and support to drivers, including licensing, vehicle registration, and road test appointments, ensuring accessibility and efficiency for all motorists.

Contact Information and Office Locations

The New Jersey Motor Vehicle Commission (NJ MVC) provides convenient access to its services through various office locations statewide. Drivers can visit any local MVC office for assistance with licensing, vehicle registration, and other related services. For those seeking the Spanish edition of the driver manual, MVC offices are equipped to provide printed copies or direct individuals to the official online PDF. Contact information, including phone numbers and office addresses, can be found on the official NJ MVC website. Offices are strategically located across the state to ensure accessibility for all residents. Visitors are encouraged to check the website for specific office hours, as they may vary by location. Additionally, the MVC offers online services to reduce the need for in-person visits, enhancing overall convenience for drivers statewide.

Online Services and Appointment Scheduling

The New Jersey Motor Vehicle Commission (NJ MVC) offers a range of online services to streamline driver-related tasks. Residents can renew licenses, register vehicles, and schedule appointments through the official MVC website. For individuals preparing for their driver’s test, the Spanish edition of the manual can be downloaded directly from the MVC portal. Additionally, the online appointment system allows users to book road tests or other services at their convenience, reducing wait times at physical locations. This digital accessibility ensures that Spanish-speaking drivers can efficiently access resources like the Manual de Manejo de New Jersey en Español PDF and manage their licensing needs without unnecessary delays.

Customer Service and Assistance

The New Jersey Motor Vehicle Commission (NJ MVC) provides comprehensive customer service to assist drivers with their needs. For Spanish-speaking individuals, bilingual representatives are available to address questions regarding the Manual de Manejo de New Jersey en Español PDF and other driver-related inquiries. Drivers can contact the MVC via phone, email, or in-person at local offices. Additionally, the MVC website offers a live chat feature for immediate support. Representatives can guide users through downloading the Spanish driver manual, understanding licensing requirements, and preparing for exams. The MVC also provides accommodations for individuals with disabilities, ensuring equal access to resources and services. This support system helps Spanish-speaking drivers navigate the licensing process efficiently and confidently.

Additional Resources for Learners

  • Driver Education Courses: Enroll in state-approved driving schools for structured learning.
  • Community Forums: Join local or online groups for shared experiences and tips.
  • Language Support: Access Spanish-language materials and tutors for better understanding.

Driver Education Courses

Driver education courses are essential for new drivers seeking to master the rules of the road and safe driving practices. These courses are designed to complement the Manual de Manejo de New Jersey en Español PDF, offering hands-on instruction and theoretical knowledge. Many driving schools in New Jersey provide Spanish-language classes, catering to Spanish-speaking learners. These courses cover topics such as traffic laws, road signs, and defensive driving techniques. Instructors often include both classroom instruction and behind-the-wheel training to ensure comprehensive preparation for the MVC tests. Enrolling in a state-approved driver education program can significantly improve your understanding of New Jersey’s driving regulations and increase your confidence on the road. Additionally, these courses are a valuable resource for learners who prefer structured guidance beyond self-study materials.

Community and Online Forums

Community and online forums provide valuable support for learners studying the Manual de Manejo de New Jersey en Español PDF. These platforms allow Spanish-speaking drivers to discuss driving-related topics, share tips, and ask questions. Many forums are dedicated to helping new drivers understand the manual’s content, such as traffic laws, road signs, and safe driving practices. Participants often exchange resources, study guides, and personal experiences to aid in preparation for the MVC tests. Online communities also offer advice on navigating the licensing process and provide moral support for learners. Some forums even host study groups or live Q&A sessions with experienced drivers or instructors. By engaging with these communities, learners can gain additional insights and clarification on complex topics, enhancing their overall understanding of New Jersey’s driving requirements.

Language Support for Spanish-Speaking Drivers

The New Jersey MVC provides robust language support for Spanish-speaking drivers, ensuring accessibility to vital information. The Manual de Manejo de New Jersey en Español PDF is a key resource, offering detailed driving laws and practices in Spanish. Additionally, MVC offices have bilingual staff to assist with inquiries and transactions. For those needing further assistance, interpreter services are available upon request. Online resources, such as translated forms and Spanish-language sections on MVC websites, complement the manual. Drivers can also access dedicated phone lines for Spanish-speaking customers, facilitating easier communication. These efforts ensure that language barriers do not hinder understanding of driving requirements. The MVC’s commitment to inclusivity helps Spanish-speaking drivers navigate the licensing process with confidence and clarity.


kenmore sewing machine model 385 manual

Category : Manuals

The Kenmore Sewing Machine Model 385 is a versatile and essential tool for various sewing tasks․ Its user-friendly design and comprehensive manual make it ideal for both beginners and experienced sewists, ensuring optimal performance and ease of use․

1․1 Overview of the Kenmore Sewing Machine Model 385

The Kenmore Sewing Machine Model 385 is a versatile and reliable appliance designed for a wide range of sewing tasks․ Known for its sturdy build and durable materials, this machine is ideal for both beginners and experienced sewists․ It offers a variety of features, including multiple stitch options and a user-friendly interface, making it suitable for sewing, repairing, and crafting projects․ The machine’s manual provides detailed guidance on setup, operation, and maintenance, ensuring optimal performance․ With its comprehensive design, the Kenmore 385 is a practical choice for anyone looking to create professional-quality results at home․ Its durability and ease of use make it a favorite among sewing enthusiasts․

1․2 Importance of the Manual for Optimal Usage

The manual for the Kenmore Sewing Machine Model 385 is essential for ensuring optimal performance and longevity of the machine․ It provides detailed instructions on threading, bobbin winding, tension adjustment, and troubleshooting common issues․ By following the manual, users can avoid errors, maintain proper machine function, and achieve professional-quality results․ The guide also includes safety precautions and maintenance tips, such as cleaning and oiling, to keep the machine in excellent condition․ Additionally, the manual covers advanced features like stitch selection and presser foot usage, helping users unlock the machine’s full potential․ Referencing the manual regularly ensures that users maximize their sewing experience and extend the life of their Kenmore 385․

Setting Up the Sewing Machine

Setting up the Kenmore Sewing Machine Model 385 involves unpacking, inspecting, and assembling if required․ Locate the model and serial numbers for future reference, ensuring everything is in working order before use․

2․1 Unpacking and Initial Inspection

Begin by carefully unpacking the Kenmore Sewing Machine Model 385 from its box․ Inspect the machine for any visible damage or scratches․ Check all components, including the power cord, presser feet, and accessories, to ensure nothing is missing or damaged․ Verify that the machine is complete and in good condition before proceeding․ Locate the model number and serial number on the nomenclature plate, usually found on the back or bottom of the machine, and record them for future reference․ Refer to the manual for guidance on proper setup and assembly if required․ Ensure all parts are accounted for and in working order before initial use․

2;2 Locating the Model Number and Serial Number

The model number and serial number of your Kenmore Sewing Machine Model 385 are crucial for warranty claims, service requests, and ordering parts․ These numbers are typically found on a nomenclature plate located on the back or bottom of the machine․ The model number starts with “385” and is followed by additional digits, while the serial number is a unique sequence that identifies your specific unit․ Carefully record both numbers in the space provided in your manual or in a secure location for easy access․ This information is essential for contacting Sears Service Centers or verifying warranty coverage․ Always have these details handy for any future maintenance or repair needs․

2․3 Assembling the Machine (if required)

Some Kenmore Sewing Machine Model 385 units may require minor assembly upon unpacking․ Begin by carefully removing all components from the packaging and inspecting for any damage․ If your machine comes partially disassembled, refer to the manual for specific instructions on attaching parts like the sewing table, presser foot, or additional accessories․ Ensure all screws and bolts are securely tightened, but avoid over-tightening to prevent damage․ Place the machine on a stable, flat surface before plugging it in․ If unsure about any step, consult the manual or contact Sears customer support for assistance․ Proper assembly is key to ensuring smooth operation and longevity of your sewing machine․

Threading the Sewing Machine

Threading the Kenmore Sewing Machine Model 385 is straightforward when following the manual’s guidance․ Proper thread alignment and tension ensure smooth stitching and optimal performance․

3․1 Step-by-Step Guide to Threading the Machine

Threading the Kenmore Sewing Machine Model 385 requires careful attention to detail to ensure proper function․ Start by placing the spool of thread on the spool pin․ Take the end of the thread and insert it into the machine’s tension discs, located at the top of the machine․ Follow the path outlined in the manual, guiding the thread through the take-up lever and down toward the needle․ Insert the thread through the needle’s eye from front to back․ Pull gently to remove any slack and ensure the thread is seated correctly․ Refer to the manual’s diagrams for visual guidance if needed․

3․2 Understanding Thread Tension Adjustment

Proper thread tension is crucial for consistent stitching on the Kenmore Sewing Machine Model 385․ The upper thread tension can be adjusted using the small dial located above the needle․ Turning the dial clockwise increases tension, while counterclockwise decreases it․ The bobbin tension, located on the bobbin case, is usually preset but may require adjustment if stitches are uneven․ Always test the tension by gently pulling the thread to ensure it’s not too tight or loose․ Improper tension can lead to issues like loose stitches or fabric puckering․ Refer to the manual for specific guidance on balancing tension for optimal sewing performance․

Bobbin Winding and Installation

Wind the bobbin evenly using the spindle, ensuring the thread is taut․ Install the bobbin into the machine’s bobbin case, aligning it properly․ Hold the thread firmly to prevent tangles․ Correct installation ensures smooth stitching and prevents operational issues․

4․1 How to Wind the Bobbin Correctly

To wind the bobbin correctly, start by placing an empty bobbin on the spindle․ Thread the machine and pull the thread through the bobbin winding guide․ Hold the thread gently but firmly to avoid tangling․ Begin winding slowly, ensuring the thread wraps evenly around the bobbin․ Avoid overfilling, as this can cause stitching issues․ Once the bobbin is full, cut the excess thread and remove it from the spindle․ Properly wound bobbins are essential for smooth stitching and consistent tension, preventing common sewing problems․

4;2 Installing the Bobbin in the Machine

Insert the wound bobbin into the bobbin case, ensuring it sits correctly in the designated area․ Gently pull the thread to guide it through the tension spring․ Snap the bobbin case into place in the machine’s bobbin compartment․ Close the compartment cover securely․ Pull the thread gently to ensure proper tension is set․ This step ensures the bobbin thread feeds smoothly during sewing․ Proper installation prevents issues like uneven stitches or thread breakage․ Always refer to the manual for specific guidance on your Kenmore 385 model to ensure accurate placement and tension setup․

Stitch Selection and Operation

The Kenmore 385 offers a variety of stitches, including straight, zigzag, and decorative options․ Easily select stitches using the dial or buttons for precise control, enhancing your sewing projects with versatility and creativity․

5․1 Types of Stitches Available on the Model 385

The Kenmore Sewing Machine Model 385 features an extensive range of stitches, including straight, zigzag, and various decorative patterns․ These stitches are ideal for different fabrics and sewing projects, from delicate materials to heavy-duty tasks․ The machine also includes stretch stitches for knits and specialized stitches for home decor․ This versatility allows users to tackle a wide array of sewing needs with precision and creativity․ The stitch selection dial makes it easy to choose the perfect stitch for any project, ensuring professional-quality results․ Whether you’re making clothes, quilts, or home decor items, the Model 385 has the right stitch for the job․ Its comprehensive stitch library ensures that sewists of all skill levels can achieve stunning outcomes․

5․2 Adjusting Stitch Length and Width

Adjusting the stitch length and width on the Kenmore Sewing Machine Model 385 is essential for achieving the desired results․ The machine features a stitch length dial and a stitch width dial, allowing precise control․ For straight stitches, set the width to a minimum, and adjust the length based on fabric type․ For zigzag stitches, both length and width can be customized․ The manual provides guidelines for common fabrics, helping users choose appropriate settings․ Proper tension maintenance is crucial to prevent fabric bunching or thread breakage․ Testing on scrap fabric before sewing ensures accurate settings․ This feature-rich machine offers flexibility, enabling users to adapt stitches to various projects with ease and precision, ensuring professional-quality outcomes for all sewing tasks․

Maintenance and Care

Regular cleaning, oiling, and proper storage are essential for maintaining the Kenmore Sewing Machine Model 385․ This ensures smooth operation and prolongs its lifespan effectively․

6․1 Cleaning the Sewing Machine

Regular cleaning is crucial for maintaining the Kenmore Sewing Machine Model 385․ Turn off and unplug the machine before starting․ Use a soft brush or lint remover to gently sweep away dust, thread scraps, and debris from the bobbin area, needle plate, and tension discs․ Avoid using liquids or harsh chemicals, as they may damage the machine’s finish or internal components․ For stubborn lint, a small, dry cotton swab can be used to clean tight spaces․ After cleaning, ensure all parts are dry and free of residue․ Proper cleaning prevents dust buildup, reduces friction, and ensures smooth operation․ Regular maintenance helps extend the machine’s lifespan and performance․

Tips: Clean after every project to prevent lint accumulation and keep the machine running efficiently․

6․2 Oiling the Machine for Smooth Operation

Regular oiling is essential to maintain the smooth operation of the Kenmore Sewing Machine Model 385․ Locate the oiling points, typically found near the bobbin area and handwheel, as indicated in the manual․ Use high-quality sewing machine oil to ensure optimal performance․ Apply a few drops to the specified areas, then gently turn the handwheel to distribute the oil evenly․ Avoid over-oiling, as excess oil can attract dust and cause maintenance issues․ After oiling, run the machine without fabric for a few minutes to allow the oil to circulate․ Proper lubrication reduces friction, prevents wear, and ensures quiet, efficient stitching․ Regular oiling is crucial for extending the machine’s lifespan and maintaining its reliability․

Tips: Always use the oil recommended in the manual to avoid damaging your machine․

6․3 Storing the Machine Properly

Proper storage is crucial to maintain the Kenmore Sewing Machine Model 385’s performance and longevity․ After cleaning and oiling, cover the machine with a dust cover or plastic bag to protect it from dust and debris․ Store it in a dry, cool place away from direct sunlight and moisture․ Avoid extreme temperatures, as they may damage the machine’s components․ Keep the machine upright to prevent oil from leaking into unwanted areas․ Store accessories like bobbins, needles, and presser feet in a separate, labeled container․ Regularly inspect stored items for signs of wear or damage․ Proper storage ensures the machine remains in excellent condition for future use․

Remember to store the machine in a secure location to prevent accidental damage or tampering․

Troubleshooting Common Issues

The Kenmore 385 manual helps users troubleshoot common issues like thread breakage, tension problems, and bobbin-related concerns, ensuring smooth sewing operations․

7․1 Diagnosing Thread Breakage Problems

Thread breakage on the Kenmore 385 sewing machine can often be traced to improper threading, incorrect tension settings, or using the wrong needle type․ To diagnose, first, check if the thread is correctly threaded through the machine, ensuring it follows the designated path without twists․ Next, inspect the tension dials to confirm they are set appropriately for the fabric type․ If issues persist, examine the bobbin area for proper winding and installation; Additionally, ensure the needle is compatible with the thread and fabric being used․ If the problem continues, consult the manual for detailed troubleshooting steps or consider professional servicing to resolve the issue effectively․

7․2 Fixing Tension Imbalances

Tension imbalances on the Kenmore 385 sewing machine can lead to uneven stitching or thread breakage․ To address this, start by ensuring the thread is correctly threaded through the machine, following the designated path without twists․ Next, check the top thread and bobbin tension dials, adjusting them slightly to achieve balanced stitches․ Using the appropriate needle type for your fabric is crucial to maintaining proper tension․ Regularly cleaning the machine to remove dust and lint can also prevent tension issues․ If problems persist, consult the manual for specific adjustment techniques or consider professional servicing to restore optimal performance and ensure smooth operation․

7․3 Solving Bobbin-Related Issues

Bobbin-related issues on the Kenmore 385 sewing machine can disrupt your sewing projects․ To resolve these, ensure the bobbin is wound correctly and evenly, avoiding over-or under-filling․ Properly install the bobbin in the case, making sure it’s seated securely and aligned with the machine’s mechanisms․ Check for lint or debris in the bobbin area, as this can cause improper threading or tension․ If the bobbin thread isn’t catching, inspect the needle for damage or incorrect installation․ Using the correct bobbin type for your machine is essential․ If issues persist, refer to the manual for troubleshooting steps or contact a Sears service center for professional assistance to ensure smooth operation and prevent further complications․

Advanced Features of the Kenmore 385

The Kenmore 385 features advanced functions like the zigzag stitch for decorative sewing and specialized presser feet for handling various fabrics and tasks efficiently․

8․1 Using the Zigzag Stitch Function

To use the zigzag stitch on the Kenmore 385, start by selecting the correct stitch option using the stitch selector dial․ Ensure the machine is properly threaded and the correct presser foot is attached for smooth fabric movement․ Adjust the stitch length and width as needed for your project․ Practice on scrap fabric to achieve the desired effect before sewing on your final material․ This feature is ideal for decorative sewing and adding unique textures to your creations․

8․2 Working with Specialized Presser Feet

Specialized presser feet are essential for optimizing the performance of your Kenmore 385 sewing machine․ The zigzag foot is ideal for general sewing, while the blind hem foot is perfect for invisible hems․ The zipper foot allows for precise stitching near zippers or thick seams․ To attach a presser foot, lift the foot holder, align the foot with the shank, and snap it into place securely․ Always unplug the machine before changing feet for safety․ Using the right presser foot ensures better fabric control, reduces bunching, and achieves professional-looking results․ Consult the manual for specific instructions on using each foot effectively for various projects․

Safety Instructions

Always handle sharp objects like needles and scissors with care․ Avoid wearing loose clothing near moving parts․ Keep children away while operating the machine․ Follow all safety guidelines to prevent accidents and ensure safe sewing experiences․

9․1 General Safety Precautions

Always prioritize your safety while operating the Kenmore Sewing Machine Model 385․ Handle sharp objects like needles and scissors with care to avoid injuries․ Keep loose clothing or long hair tied back to prevent entanglement with moving parts․ Ensure the machine is placed on a stable, flat surface to avoid accidental tipping․ Never leave the machine unattended while it is in operation, especially if children are nearby․ Avoid operating the machine when fatigued or distracted․ Regularly inspect the machine for damage or wear and tear․ Follow all electrical safety guidelines to prevent shocks or malfunctions․ By adhering to these precautions, you can ensure a safe and enjoyable sewing experience․

9․2 Electrical Safety Guidelines

To ensure safe operation of the Kenmore Sewing Machine Model 385, follow these electrical safety guidelines․ Always unplug the machine when not in use or during maintenance to prevent accidental start-ups․ Avoid using damaged power cords or plugs, as they can cause electrical shocks․ Keep the machine away from water and moisture to prevent short circuits․ Use only the power source specified in the manual to avoid overloading the motor․ Never touch electrical components with wet hands or while standing on a wet surface․ Store the machine in a dry, cool place to protect its electrical systems․ If you suspect a malfunction, disconnect the power immediately and contact a qualified technician․ Prioritizing electrical safety helps protect both you and your machine from potential hazards․

Compatible Accessories

The Kenmore Sewing Machine Model 385 supports various accessories, including specialized presser feet, additional bobbins, and extension tables․ These enhance functionality and versatility for different sewing projects․

10․1 List of Recommended Presser Feet

The Kenmore Sewing Machine Model 385 is compatible with a variety of presser feet to enhance sewing capabilities․ Recommended options include the zigzag foot for decorative stitching, the zipper foot for precise zipper installation, and the buttonhole foot for creating professional buttonholes․ Additionally, the blind hem foot is ideal for sewing invisible hems, while the walking foot helps manage thick fabrics like denim․ These accessories are designed to optimize performance and expand the machine’s versatility for diverse sewing projects․ They can be purchased from Sears or authorized Kenmore dealers, ensuring compatibility and quality․

10․2 Additional Accessories for Enhanced Sewing

Enhance your sewing experience with additional accessories designed for the Kenmore Sewing Machine Model 385․ These include extra bobbin cases for quick thread changes, replacement needles in various sizes, and quilting bars for managing larger projects․ The embroidery hoop allows for intricate designs, while specialized presser feet like the edge joining foot and overlock foot expand stitching options․ Maintenance tools, such as brushes and screwdrivers, are also available to keep the machine in top condition․ These accessories can be purchased from Sears or authorized Kenmore dealers, ensuring compatibility and quality․ They help users achieve professional results and maintain the machine’s performance for years to come․

Warranty and Service Information

The Kenmore Sewing Machine Model 385 is backed by a comprehensive warranty․ Contact Sears Service Centers for repairs or inquiries, ensuring to provide the machine’s model and serial number for efficient assistance․

11․1 Understanding the Warranty Coverage

The Kenmore Sewing Machine Model 385 is covered by a limited warranty that protects against defects in materials and workmanship․ The warranty period varies depending on the specific model and components, ensuring coverage for parts and labor under normal use․ To maintain warranty validity, users must register their machine and retain the purchase receipt․ The warranty does not cover damages resulting from misuse, improper maintenance, or unauthorized repairs․ For detailed terms and conditions, refer to the warranty section in the manual․ Always record the model number and serial number for warranty service requests․ Contact Sears Service Centers for any warranty-related inquiries or claims․

11․2 Contacting Sears Service Centers

To contact Sears Service Centers for assistance with your Kenmore Sewing Machine Model 385, visit their official website or call their customer service hotline․ Enter your machine’s model number, which can be found on the nomenclature plate, to locate the nearest service center․ Have your model number and serial number ready, as well as a detailed description of the issue, to expedite the process․ Sears Service Centers provide authorized repairs, maintenance, and genuine parts, ensuring your machine remains in optimal condition․ For warranty-related services, ensure your machine is registered and all required documentation is available․ Always use Sears-authorized service centers to maintain warranty validity and ensure reliable support․

Mastering the Kenmore Sewing Machine Model 385 is achievable with this manual․ Follow the guide for efficient operation, proper care, and troubleshooting to ensure longevity and performance․

12․1 Summary of Key Points

This manual provides a comprehensive guide for the Kenmore Sewing Machine Model 385, covering setup, operation, and maintenance․ It includes detailed instructions for threading, bobbin winding, and stitch selection, ensuring optimal performance․ Troubleshooting tips and safety guidelines are emphasized to enhance user experience․ The manual also highlights the importance of proper cleaning, oiling, and storage to extend the machine’s lifespan․ Accessories and warranty information are included for convenience․ By following this guide, users can maximize their sewing efficiency and enjoy a seamless creative process․ Regular maintenance and adherence to safety precautions are key to preserving the machine’s functionality and ensuring years of reliable service․

12․2 Final Tips for Maximizing Machine Performance

To ensure the Kenmore Sewing Machine Model 385 operates at its best, regular maintenance is crucial․ Always thread the machine correctly and adjust tension as needed to prevent thread breakage․ Select the appropriate stitch type for your fabric to achieve professional results․ Keep the machine clean and well-oiled to maintain smooth operation․ Use compatible accessories and presser feet for specific tasks․ Avoid overloading the machine and ensure a stable power supply․ Store the machine properly when not in use to protect it from dust and damage․ By following these tips, you can extend the machine’s lifespan and enjoy consistent, high-quality sewing performance․


manual for arctic king air conditioner

Category : Manuals

The Arctic King Air Conditioner is a reliable solution for cooling needs, offering models like the 12000 BTU version. Designed for efficiency and comfort, it features insulation panels and eco-friendly refrigerants like R410a. With a focus on quiet operation and energy savings, this unit is ideal for home use, supported by a comprehensive manual for optimal performance.

1.1 Overview of the Arctic King Air Conditioner

The Arctic King Air Conditioner is a trusted choice for efficient cooling, offering models like the 12,000 BTU unit. Designed for versatility, it suits various room sizes and provides consistent temperature control. With features like R410a refrigerant, energy-efficient operation, and quiet performance, it ensures comfort while being environmentally friendly. The unit comes with an easy-to-use remote and LED display, making it a practical solution for home cooling needs. Proper installation and maintenance, as outlined in the manual, are key to optimal performance and longevity.

1.2 Importance of the User Manual

The user manual is essential for understanding and optimizing the Arctic King Air Conditioner’s performance. It provides detailed installation instructions, safety precautions, and troubleshooting tips. By following the manual, users can ensure proper setup, energy efficiency, and longevity of the unit. It also explains error codes, maintenance routines, and eco-friendly practices. Referencing the manual helps users avoid common issues and ensures safe operation, making it a vital resource for both installation and daily use.

Key Features and Specifications

The Arctic King Air Conditioner offers 12000 BTU cooling capacity, energy-efficient operation, and eco-friendly R410a refrigerant. It features low noise levels and is designed for home use.

2.1 Cooling Capacity and BTU Ratings

The Arctic King Air Conditioner offers a robust cooling capacity, with models featuring up to 12000 BTU ratings. British Thermal Units (BTUs) measure cooling power, and higher ratings indicate greater cooling capability. This makes the Arctic King suitable for medium-sized rooms, ensuring efficient temperature control. The unit’s design optimizes airflow and energy use, providing consistent cooling while maintaining a balance between performance and energy efficiency.

2.2 Energy Efficiency and Eco-Friendliness

The Arctic King Air Conditioner is designed with energy efficiency in mind, utilizing eco-friendly refrigerants like R410a, which minimize environmental impact. The unit features advanced insulation panels to reduce energy loss and optimize cooling performance. With a focus on sustainable operation, the Arctic King ensures lower power consumption while maintaining effective cooling, making it an environmentally responsible choice for homeowners seeking to balance comfort and energy savings.

2.3 Noise Levels and Operational Modes

The Arctic King Air Conditioner operates with minimal noise, featuring sound levels ranging from 65.8 to 81 dB(A), ensuring a quiet environment. It offers multiple operational modes, including silent mode for reduced noise and fan-only mode for air circulation without cooling. These modes enhance comfort and flexibility, allowing users to tailor the unit’s performance to their needs while maintaining efficient operation and energy savings. The unit’s design prioritizes quiet performance, making it suitable for home and office spaces.

Installation and Setup

Ensure proper installation with insulation panels and weatherstripping kits for optimal performance. Follow pre-installation checks and step-by-step guides for window or portable setups, adhering to safety guidelines.

3.1 Pre-Installation Checks

Before installing your Arctic King Air Conditioner, ensure the area is clear and level. Verify the window dimensions match the unit’s size for proper fit. Check the electrical supply matches the conditioner’s voltage requirements. Inspect the unit for any damage and ensure all accessories like insulation panels are included. Proper pre-installation checks ensure safe and efficient operation, preventing potential issues like water leaks or poor airflow. Follow the manual’s guidelines for a hassle-free setup.

3.2 Step-by-Step Installation Guide

Begin by placing the Arctic King Air Conditioner on a firm, level surface, such as a windowsill. Ensure the unit is securely positioned and level. Install the mounting brackets provided in the kit to stabilize the conditioner. Secure the side panels tightly to prevent air leaks. Place the insulation panel on the window to maintain efficiency. Connect the drain hose and plug in the unit. Finally, test the conditioner by setting it to a low cooling mode to ensure proper function. Always follow safety guidelines for a stable installation.

3.3 Window and Portable Installation Options

The Arctic King Air Conditioner offers versatile installation options. For window installation, ensure the unit fits securely, using the provided insulation panels to seal gaps and prevent air leaks. Portable models can be placed in any well-ventilated room, with the exhaust hose directed outside. Both options require a level surface and proper drainage setup to function efficiently. Follow the manual’s guidelines for securing the unit and ensuring stability to maximize performance and safety.

Operating the Air Conditioner

Operate the Arctic King Air Conditioner using the control panel or remote. Adjust temperature, fan speed, and modes for optimal comfort. Refer to the manual for settings.

4.1 Understanding the Control Panel and Remote

The Arctic King Air Conditioner features an intuitive control panel with an LED display and buttons for temperature, fan speed, and mode selection. The remote control offers convenient operation from a distance, allowing users to adjust settings without moving. The control panel includes a thermostat, timer, and eco-mode for energy efficiency. Understanding these components ensures optimal performance. Refer to the manual for detailed guidance on using the control panel and remote effectively to customize your cooling experience.

4.2 Setting the Thermostat and Temperature Modes

The Arctic King Air Conditioner allows precise temperature control via its thermostat, which can be adjusted using the control panel or remote. Modes include Cool, Fan, and Dry, catering to different needs. Set your desired temperature between 60-90°F for optimal comfort. The thermostat maintains the set temperature, ensuring efficient cooling. Use the remote to conveniently switch modes or adjust settings. For energy savings, enable the timer or eco-mode, which optimizes performance based on room conditions. Adjusting these settings properly ensures a comfortable and energy-efficient cooling experience.

4.3 Airflow and Fan Speed Adjustments

The Arctic King Air Conditioner offers adjustable airflow and fan speed settings to customize your cooling experience. Use the remote or control panel to direct air flow vertically or horizontally. Choose from multiple fan speeds—low, medium, or high—to optimize air circulation. The swing mode ensures even air distribution across the room. Adjusting these settings helps maintain consistent temperatures, reduces noise, and enhances comfort. Proper airflow management improves efficiency and ensures the unit operates effectively in various room layouts and conditions.

Maintenance and Upkeep

Regular maintenance ensures optimal performance. Clean the air filter, check drainage, and service the unit annually. Proper upkeep extends lifespan and maintains efficiency, preventing issues.

5.1 Cleaning the Air Filter and Grill

Cleaning the air filter and grill is essential for maintaining efficiency. Turn off the unit and unplug it for safety. Remove the filter and wash it with mild soap and warm water. Allow it to dry completely before reinstalling. Use a soft brush or cloth to wipe the grill, ensuring no dust or debris obstructs airflow. Regular cleaning prevents reduced cooling performance and energy waste. Clean the filter monthly or as needed based on usage. Proper maintenance ensures optimal operation and energy savings.

5.2 Drainage and Water Leak Prevention

Proper drainage is crucial to prevent water leaks. Ensure the drain pan is clear and the unit is level to avoid water accumulation. Regularly inspect the condensate drain hose for blockages. If installed in a window, check that the unit is slightly tilted backward to direct water outside. Consider using a condensate pump for units in basements or areas with poor drainage. Addressing drainage issues promptly prevents water damage and mold growth, ensuring safe and efficient operation of your Arctic King air conditioner.

5.3 Regular Servicing and Professional Maintenance

Regular servicing is essential for optimal performance and longevity. Clean or replace air filters every 30 days to maintain airflow and efficiency. Inspect the condenser coils annually for dirt buildup and clean them if necessary. Check refrigerant levels and ensure proper charging to avoid reduced cooling capacity. Have a licensed technician perform professional maintenance at least once a year to inspect internal components and address potential issues before they escalate. This ensures your Arctic King air conditioner operates efficiently and reliably throughout its lifespan.

Troubleshooting Common Issues

Troubleshooting common issues with your Arctic King air conditioner involves checking error codes, ensuring proper refrigerant levels, and addressing unusual noises promptly to maintain efficiency and performance.

6.1 Identifying and Solving Common Problems

Common issues with the Arctic King air conditioner include error codes, insufficient cooling, and unusual noises. Check the error code list in the manual for specific solutions. For cooling issues, ensure proper installation and clean filters. Strange noises may indicate loose parts or improper leveling. Regularly inspect refrigerant levels and ensure proper drainage to prevent water leaks. Addressing these problems promptly ensures optimal performance and extends the unit’s lifespan. Always refer to the manual for detailed troubleshooting steps.

6.2 Error Codes and Their Meanings

The Arctic King air conditioner displays error codes like E1, E2, or E3, indicating specific issues. E1 often relates to sensor malfunctions, while E2 may signal refrigerant leaks. E3 could indicate a communication error between the indoor and outdoor units. Refer to the manual for a detailed list of codes and their meanings. Addressing these issues promptly ensures efficient operation and prevents further damage. Always follow the recommended solutions or consult a professional if the problem persists.

6.3 Resetting the Air Conditioner

To reset the Arctic King air conditioner, turn it off at both the unit and the circuit breaker. Wait 30 seconds to allow the system to fully power down. Switch it back on and check if the issue is resolved. If the problem persists, refer to the error code section or contact customer support. Resetting can resolve minor glitches without needing professional assistance. Ensure proper power cycling to maintain optimal performance and prevent further issues. Regular resets can help maintain efficiency and extend the unit’s lifespan.

Energy Efficiency and Cost Savings

Energy efficiency is crucial for reducing costs. Arctic King air conditioners offer high EER and Energy Star ratings, ensuring lower energy consumption and long-term savings. Explore tips to maximize efficiency.

7.1 Understanding EER and Energy Star Ratings

The Energy Efficiency Ratio (EER) measures cooling capacity per power consumption. Higher EER indicates better efficiency. Energy Star certification ensures the unit meets EPA standards for energy savings. Arctic King air conditioners with high EER and Energy Star ratings reduce energy bills and environmental impact. These ratings guide consumers in selecting eco-friendly, cost-effective models. Understanding these metrics helps optimize energy use and long-term savings, aligning with eco-conscious practices.

7.2 Tips for Reducing Energy Consumption

To minimize energy use with your Arctic King air conditioner, ensure proper installation with insulation kits. Use programmable thermostats to maintain consistent temperatures. Regularly clean filters and check for refrigerant leaks. Utilize fan mode to circulate cooled air efficiently. Close windows and doors tightly to prevent air leakage. Lower the unit’s workload by shading windows during peak sun hours. These practices optimize performance, reduce energy bills, and extend the unit’s lifespan while promoting eco-friendly operation.

Environmental Considerations

The Arctic King air conditioner uses eco-friendly R410a refrigerant, ensuring minimal environmental impact. Proper disposal and recycling of parts are essential for sustainability and environmental safety.

8.1 Refrigerant Type and Safety

The Arctic King air conditioner utilizes R410a refrigerant, a more environmentally friendly alternative to older chlorofluorocarbons. This refrigerant minimizes ozone layer depletion and adheres to modern safety standards. Proper handling is crucial to prevent leaks, which can pose environmental risks. Users should follow manual guidelines for safe operation and disposal, ensuring compliance with eco-friendly practices. Regular checks for refrigerant leaks are recommended to maintain efficiency and environmental safety.

8.2 Proper Disposal and Recycling Guidelines

Proper disposal of the Arctic King air conditioner is essential to protect the environment. Users should ensure refrigerants like R410a are safely removed by certified professionals. The unit’s metal components can be recycled, reducing waste. Always follow local regulations and guidelines for appliance disposal. The manual recommends checking with local recycling centers for appropriate procedures. Eco-friendly disposal helps minimize environmental impact and promotes sustainable practices.

Accessories and Optional Features

Enhance your Arctic King AC experience with accessories like insulation kits and programmable thermostats. These features improve efficiency and compatibility with smart home systems for convenience.

9.1 Insulation and Weatherstripping Kits

Insulation and weatherstripping kits are essential for maximizing the efficiency of your Arctic King air conditioner. These kits help prevent air leaks, ensuring cooled air stays inside and hot air remains outside. Proper insulation also reduces noise and vibrations, enhancing overall performance. By sealing gaps around the unit, you maintain consistent cooling and lower energy consumption. These kits are easy to install and are highly recommended for both window and portable air conditioner setups to ensure optimal functionality and energy savings. Always use genuine or compatible kits for best results.

9.2 Programmable Thermostats and Smart Home Integration

Programmable thermostats and smart home integration enhance your Arctic King air conditioner’s functionality. These features allow you to schedule cooling in advance, optimizing energy use and comfort. Smart home compatibility enables control via Wi-Fi, using apps or voice commands with systems like Alexa or Google Home. Remote access lets you adjust settings, monitor energy consumption, and receive maintenance alerts. Ensure compatibility with your unit for seamless integration, improving efficiency and convenience while maintaining your desired comfort levels effortlessly.

User Safety and Precautions

Ensure electrical safety by avoiding overloaded circuits and using grounded outlets. Prevent fire hazards by keeping flammable materials away and following installation guidelines carefully.

10.1 Electrical Safety Guidelines

Always use a grounded electrical outlet rated for the unit’s power requirements. Avoid overloading circuits and ensure the conditioner is installed by a licensed technician. Keep the unit away from water sources to prevent electrical shock. Never use damaged cords or plugs, as they pose fire risks. Regularly inspect the power cord for signs of wear. Ensure proper ventilation to avoid overheating. Follow all local electrical codes and manufacturer recommendations for safe operation. Consult a professional if unsure about any electrical connections;

10.2 Avoiding Overloading and Fire Hazards

Avoid overloading circuits by ensuring the air conditioner is the only appliance on its electrical circuit. Never use extension cords, as they can overheat and cause fires. Keep flammable materials away from the unit. Regularly inspect electrical components for damage or wear. Ensure proper installation by a licensed technician to prevent electrical issues. Avoid operating the conditioner near water sources or in poorly ventilated areas, as this can increase fire risks. Always follow the manufacturer’s guidelines to ensure safe operation.

Warranty and Customer Support

The Arctic King Air Conditioner comes with a comprehensive warranty covering parts and labor for a specified period. For assistance, contact customer support via phone, email, or online chat for troubleshooting and service requests. Ensure to register your product for extended benefits and faster assistance. Refer to the manual for detailed warranty terms and conditions.

11.1 Understanding the Warranty Coverage

The Arctic King Air Conditioner is backed by a comprehensive warranty that covers parts and labor for a specified period. The warranty typically includes repairs or replacements for defective components due to manufacturing issues. Registration is often required to activate the warranty, ensuring extended protection. Coverage may exclude damages caused by improper installation or misuse. Always refer to the manual for detailed terms and conditions, including the duration and scope of the warranty. This ensures optimal protection for your investment. Proper maintenance can also extend warranty benefits.

11.2 Contacting Customer Service

For assistance with your Arctic King Air Conditioner, customer service can be reached via phone or email. The support team is available to address inquiries, provide troubleshooting guidance, and assist with warranty claims. Visit the official website for contact details and additional resources, such as FAQs and service center locations. Ensure to have your model number and purchase details handy for efficient support. Representatives are trained to resolve issues promptly, ensuring optimal performance of your unit. Refer to the manual for specific contact information and support options.

The Arctic King Air Conditioner manual provides essential guidance for optimal performance, efficiency, and eco-friendly operation; Proper usage ensures a cooler, more comfortable environment while minimizing energy consumption effectively.

12.1 Summary of Key Points

The Arctic King Air Conditioner manual emphasizes proper installation, energy efficiency, and eco-friendly features. With BTU ratings like 12000, it ensures powerful cooling. Using R410a refrigerant, it aligns with environmental standards. Key features include insulation panels, LED displays, and programmable thermostats for optimal performance. Regular maintenance, such as cleaning filters, is crucial. The manual also covers troubleshooting, warranty details, and safety guidelines. By following the manual, users can maximize efficiency, reduce energy costs, and enjoy a comfortable environment while minimizing environmental impact.

12.2 Final Tips for Optimal Performance

For optimal performance, ensure proper installation using insulation panels and weatherstripping kits. Regularly clean the air filter and check for refrigerant leaks. Use programmable thermostats to maintain energy efficiency and adjust settings when the room is unoccupied. Keep the unit away from direct sunlight and ensure good airflow. Refer to the manual for specific maintenance schedules and troubleshooting guides to extend the lifespan and efficiency of your Arctic King Air Conditioner;